How to Care for Wood Furniture and Keep It Beautiful for Years
Taking care of your wood furniture comes down to two simple principles: consistent, gentle cleaning and proactive protection. It's about building easy habits, like dusting every week with a microfiber cloth and always using a coaster. Since 1978, our family at Tip Top Furniture & Mattresses has been helping our neighbors in the Greater Albany Capital Region protect their investments, and these small steps are what keep your favorite pieces looking beautiful for years to come.
Your Foundation for Lasting Beauty
Here at our family-owned showroom in Freehold, NY, we've spent over 45 years helping folks from Albany to Schenectady find furniture that becomes part of their family's story. The most common question we get isn't about style—it's about how to keep a piece looking brand new. The secret isn't some intense, once-a-year deep clean. It's the small, consistent things you do every day.
Think of it like preventive care for your home. You wouldn't leave a new car out in a hailstorm, right? In the same way, protecting your wood furniture from the little things in daily life is what ensures its longevity. This is especially true for heirloom-quality pieces, like the solid wood, USA-made Amish furniture we carry, which are built to be passed down from one generation to the next.
The Non-Negotiables of Daily and Weekly Care
The core of good wood furniture care isn't a complicated formula; it's a simple, trustworthy routine. Getting these habits down will prevent 90% of the common damage we see, like scratches, water rings, and a dull, lifeless finish. Believe our 45+ years of experience—it’s a whole lot easier to prevent a water ring than it is to get one out.
Here are the absolute essentials:
- Use Coasters and Placemats: This is the single most effective thing you can do. Water rings from a cold glass, heat marks from a coffee mug, and food stains are the biggest enemies of a perfect finish.
- Add Protective Pads: Stick some felt or cork pads under lamps, vases, and any other decorative items sitting on your wood surfaces. This stops the tiny scratches that happen when things get bumped or shifted around.
- Lift, Don't Drag: When you need to move something on your furniture, always lift it. Dragging an item, even a light one, can create deep gouges that are a real pain to fix.
- Act on Spills Immediately: Don't let a spill sit. The moment it happens, blot it up right away with a soft, absorbent cloth. Wiping can actually spread the liquid and push it deeper into the wood grain.
Before we dive into a weekly checklist, it's worth taking a look at a simple plan you can follow. A simple checklist can make all the difference in keeping your weekly care on track, turning a chore into a quick, easy routine.
Weekly Wood Furniture Care Checklist
| Task | Tool or Product | Why It Matters |
|---|---|---|
| Dusting | Microfiber cloth | Removes abrasive particles that cause micro-scratches and dull the finish over time. |
| Spot Check | Soft cloth, Water | Catches any sticky spots or fingerprints before they become harder to remove. |
| Inspect | Your eyes! | Allows you to catch any new scratches or dings early so you can address them. |
| Rotate Items | N/A | Prevents permanent light or dark spots from forming under decorative objects. |
Following these simple steps each week will do more for your furniture's health than any intensive annual cleaning ever could. It’s about maintenance, not restoration.
Mastering the Art of Dusting
Dust might look harmless, but it's full of tiny abrasive particles that act like fine-grit sandpaper on your furniture's finish. Over time, this creates a web of microscopic scratches that make the surface look dull. So, dusting isn't just for looks—it's a critical maintenance task.
The best tool for the job is a soft, dry microfiber cloth. Feather dusters tend to just push dust into the air, where it settles right back down. A good microfiber cloth, on the other hand, has tiny fibers that actually grab and hold onto the dust particles. For those tricky spots like intricate carvings, a clean, soft-bristled paintbrush works wonders without any risk of damage.
Thinking about maintenance when you’re shopping for new furniture is also a smart move. If you're curious about what to look for, we have a helpful guide on 5 things to look for when buying chests, dressers, and cabinets.
Your weekly dusting routine is your first line of defense. It stops that grimy buildup that eventually clouds the finish and hides the beautiful, natural grain of the wood. This simple act preserves the depth and warmth that made you fall in love with the piece in the first place.
This idea of preserving furniture is more important now than ever. The global market for wood furniture was valued at approximately USD 288.0 billion in 2024 and is expected to keep growing. People are shifting back toward sustainable, high-quality pieces that are meant to last a lifetime. Taking proper care of your furniture ensures your investment holds its value and its beauty as more people come to appreciate well-crafted pieces. You can find more about the wood furniture market on imarcgroup.com.
Matching Your Care to Your Furniture's Finish
Have you ever wondered why the same cleaning method makes your neighbor's dining table sparkle but leaves yours looking dull? The secret almost always lies in the finish. That protective layer on your wood furniture dictates its care routine far more than the actual type of wood. Since 1978, we've been helping homeowners across the Greater Albany Capital Region, from Schenectady to Troy, understand this crucial difference to make sure their beloved pieces get exactly the right treatment.
Think of the finish as your furniture's language. A hard, sealed surface like lacquer or polyurethane speaks a different language than a soft, penetrating finish like oil. Using the wrong "words"—or cleaning products—can cause damage that's tough, and sometimes impossible, to reverse. Learning to identify and care for your specific finish is the expert-level step that keeps furniture looking fantastic for a lifetime.
Identifying Your Furniture's Finish
Before you can care for it, you have to know what you're dealing with. Most modern furniture has a tough, durable finish, but older or handcrafted pieces might have something a bit more delicate.
Here’s a simple test you can perform in a hidden spot, like the underside of a tabletop:
- Try a Drop of Linseed Oil: If the oil beads up, you’re looking at a hard, sealed finish like varnish, lacquer, or polyurethane. If it soaks right in, you probably have an oil finish.
- Try a Drop of Denatured Alcohol: If the finish gets sticky or starts to dissolve, it's almost certainly shellac. If it just softens a bit, it’s likely varnish. No effect at all? You've got a modern lacquer or polyurethane on your hands.
This quick check is your roadmap to proper care, helping you pick the right products and steer clear of costly mistakes.
Caring for Hard, Sealed Finishes (Lacquer, Varnish, Polyurethane)
These are the workhorses of the furniture world and the most common finishes you'll find on factory-made pieces today. They're designed for durability, creating a protective barrier that sits on top of the wood to shield it from moisture and minor scratches. It’s like the clear coat on a car.
When it comes to these surfaces, less is more.
- Cleaning: A simple wipe-down with a soft, lint-free cloth lightly dampened with water is usually all it takes. For stickier messes, a mild soap solution (just a few drops of dish soap in a bowl of water) does the trick. Always follow up with a clean, damp cloth to remove any soap residue, and then dry the surface completely.
- Polishing: Steer clear of silicone-based polishes and aerosol sprays. These products are notorious for creating a cloudy, hazy buildup that’s a magnet for dust and a headache to remove. A high-quality paste wax, applied once or twice a year, is a much better option for restoring shine and adding an extra layer of protection.
Caring for Penetrating Finishes (Oil and Wax)
Instead of sitting on top, oil and wax finishes are designed to soak into the wood, becoming a part of it. This creates that beautiful, natural, close-to-the-wood feel you often see in high-quality, handcrafted pieces, like the stunning Amish furniture we feature in our Freehold showroom. You can explore our collection of Amish furniture to see this incredible craftsmanship for yourself.
These finishes need a little more hands-on maintenance because they have to be replenished over time.
- Cleaning: Regular dusting with a dry cloth is your first line of defense. For actual cleaning, use a cloth dampened with a gentle wood cleaner made specifically for oiled woods. Never use all-purpose cleaners, as they can strip the oil right out of the finish.
- Re-Oiling: An oiled finish will let you know when it's thirsty—it will start to look a little dry or dull. Depending on how much use it gets, you may need to reapply a light coat of an appropriate furniture oil (like tung or linseed oil) every six months to a year. This nourishes the wood and brings back its rich luster.
This visual guide can help simplify your first response to common furniture mishaps, from everyday dust to sudden spills.
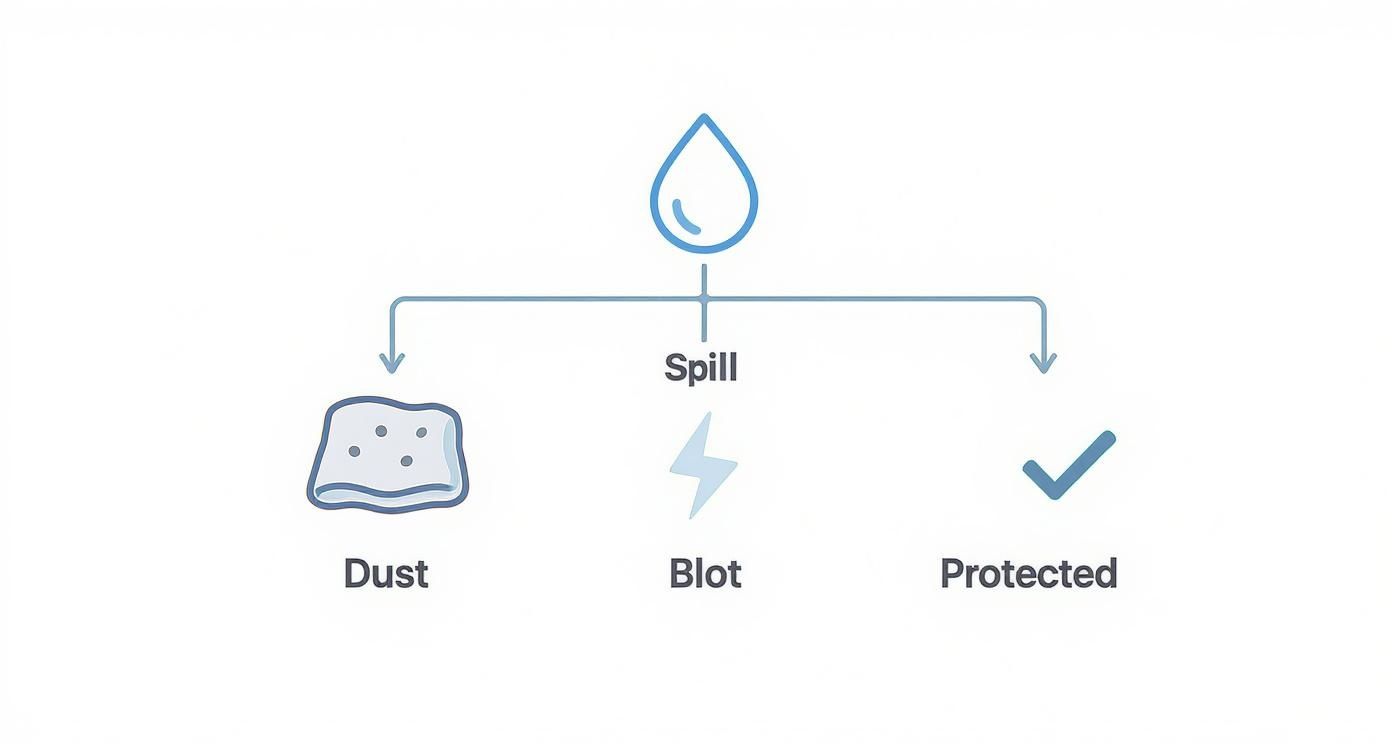
The decision tree shows the immediate actions to take: first dusting, then blotting spills, to keep your furniture protected from daily life.
Expert Takeaway: The single biggest mistake we see is people using an oil-based polish on a lacquered surface. It doesn't "feed" the wood; it just creates a greasy film on top of the finish that attracts every speck of dust and every fingerprint in the room. Always match the product to the finish, not the wood.
Modern manufacturing has made furniture finishes more durable than ever. Precise finishing techniques have improved longevity so much that they've contributed to a 15% increase in customer satisfaction in recent years. This means your consistent, correct care routine is more effective than ever at keeping your furniture beautiful.
Finally, if you're ever considering a new finish or a touch-up project, remember that success starts at the very beginning. Understanding the steps for properly preparing wood for painting is the foundation for any lasting and beautiful result, ensuring all your care efforts pay off for years to come.
Protecting Your Furniture in the Albany Capital Region Environment
Your home’s environment plays a silent, but powerful, role in the life of your wood furniture. We've been helping customers with our professional design services since 1984, and one of the biggest lessons we share is that solid wood acts a lot like a living thing—it responds to its surroundings, especially sunlight and humidity.
Here in the Greater Albany Capital Region, we see some dramatic seasonal swings. Understanding how to manage these environmental factors is the key to preventing long-term damage like fading, warping, and cracking.

Taking a proactive approach is more important than ever. The global wooden furniture market was valued at USD 461.84 billion in 2024, which shows just how much people prefer natural, quality pieces. As homeowners invest more, they're also getting smarter about proper care to make sure that investment lasts.
The Battle Against Sunlight
Direct sunlight is one of wood's biggest enemies. Think of the sun’s ultraviolet (UV) rays as a slow-acting bleach; over time, they will fade the color and break down the protective finish on your furniture. You’ve probably seen it before on a dining table where one spot gets hit with the afternoon sun every day, leaving it noticeably lighter than the rest.
Sunlight doesn't just affect the color. It also dries out the natural oils in the wood, which can make it brittle and more likely to crack.
The solution is pretty simple, but it requires a bit of planning.
- Strategic Placement: Try to avoid placing your most valuable or beloved pieces directly in front of south-facing windows where the sun is at its most intense.
- Window Treatments: Simple things like blinds, curtains, or even sheer drapes can make a huge difference by diffusing the sunlight. UV-blocking films for your windows are another great, nearly invisible, option.
- Regular Rotation: If you keep decorative items like a vase or a lamp on a tabletop, make a habit of moving them around every so often. This ensures the wood underneath ages evenly with the rest of the surface.
Managing New York's Humidity Swings
Anyone living in Upstate New York knows our climate can be a rollercoaster. We go from dry, furnace-blasted air in the winter to thick, humid air in the summer. Because wood is porous, it naturally absorbs and releases moisture from the air, causing it to expand and contract. This is normal, but extreme shifts can cause real problems.
In the winter, low humidity makes wood shrink and crack. You might notice drawers feel a bit loose, or tiny gaps might appear in the joints of a chair. Then, in the summer, the high humidity causes the wood to swell, which is why doors and drawers can suddenly start to stick.
Expert Insight from Freehold: The sweet spot for solid wood furniture is a humidity level between 40% and 60%. Keeping your home's environment within this range is the single best thing you can do to prevent the stress that leads to warping and splitting.
Creating a Stable Home Environment
Hitting that ideal humidity balance is easier than you might think, and it’s good for more than just your furniture—it helps protect your wood floors, too. In fact, some of the same principles apply from a guide we wrote on how to protect your floors from your furniture.
To keep your home’s climate stable all year long, these two tools are your best friends:
- Use a Humidifier in Winter: When the heat is on, run a humidifier to put moisture back into the dry air. This will stop your wood furniture from shrinking and cracking.
- Use a Dehumidifier or AC in Summer: During the warmer, stickier months, a dehumidifier or your air conditioner will pull that excess moisture out of the air, preventing the wood from swelling.
For even more specific ideas, there are great cabinet humidity control tips that can help you protect pieces from moisture damage. By creating this kind of stable environment, you aren't just cleaning your furniture—you're preserving its structure and beauty for decades to come.
A Practical Guide to Everyday Furniture Repairs
No matter how careful you are, life happens. A coffee mug gets set down too hard, a pen slips out of a hand, or a glass leaves behind that dreaded white ring. Here at our Freehold showroom, we’ve always believed that furniture is meant to be lived with, not just looked at. Part of that means knowing how to handle the small accidents that come with a busy home.
This hands-on guide is all about empowering you with simple, effective DIY fixes for the most common mishaps. With a little know-how, you can tackle minor repairs yourself and keep your furniture looking its best. It's the kind of practical, trustworthy advice we've shared with families across the Albany Capital Region for over 45 years.
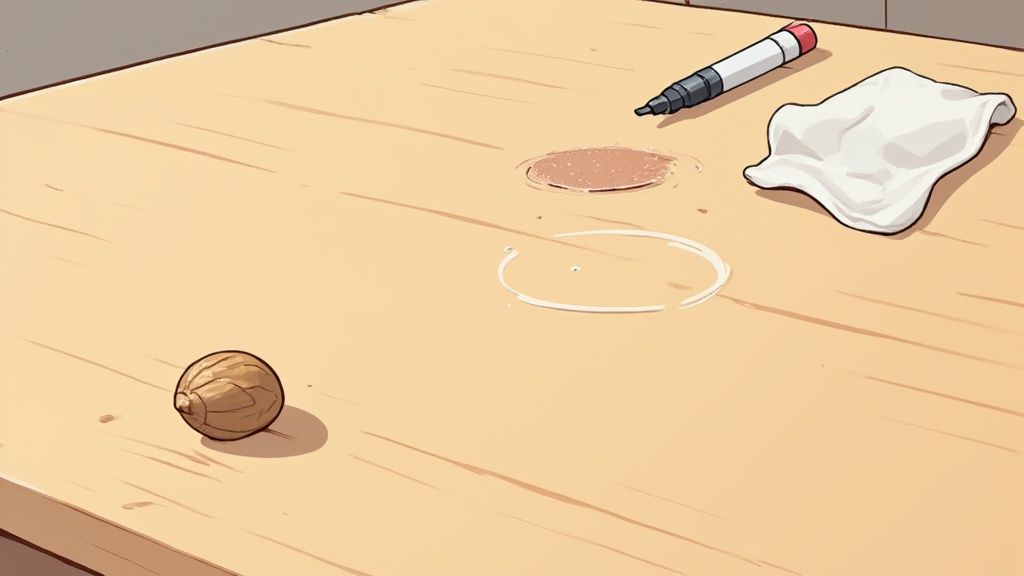
Tackling Minor Scratches and Dings
Surface scratches often look worse than they are—they're usually just in the top layer of the finish and can be surprisingly easy to disguise. Before you reach for a complex kit, try one of these simple, proven methods.
- The Walnut Trick: For light-colored woods like oak or maple, simply rubbing the meat of a walnut or pecan over a shallow scratch can work wonders. The natural oils help darken and fill in the blemish, making it blend right in.
- Touch-Up Markers and Crayons: For deeper color, furniture touch-up markers or wax crayons are fantastic. They come in tons of wood tones, from light pine to deep mahogany. The key is to start with a shade slightly lighter than your furniture and build up the color in thin layers.
- A Bit of Tea: For a quick fix on medium-toned wood, brew a strong cup of black tea. Once it cools, use a cotton swab to dab a tiny amount onto the scratch. The tannins in the tea will naturally stain the exposed wood, helping it disappear.
These little fixes can make a huge difference, especially for pieces in high-traffic areas. Sometimes, a simple repair is all it takes to make a piece look well-loved instead of just plain worn.
Erasing Common Stains and Rings
Stains can be intimidating, but most can be handled if you act quickly and use the right technique.
White Water Rings
That milky white ring is usually just moisture trapped in the top layer of the finish. Place a clean, dry cotton cloth (an old t-shirt is perfect) over the stain. Then, press a warm iron—on a low, no-steam setting—over the cloth for a few seconds at a time. The gentle heat helps evaporate the trapped moisture.
Dark Water Rings
If the ring is dark, it means water has gotten through the finish and stained the wood itself. This is a more serious issue that often needs professional attention, as it may involve stripping and refinishing the area.
Ink and Marker Stains
For a fresh ink stain on a hard, sealed finish, try dabbing it gently with a cloth dampened with denatured alcohol. Just be sure to test it in a hidden spot first! If the ink has set, you may need a more specialized approach.
Our Pro Tip from 45 Years of Experience: When dealing with any stain, the golden rule is to always start with the mildest method first. Aggressive scrubbing or harsh chemicals can turn a small, fixable problem into a much larger one. Patience and a gentle touch are your best tools.
DIY Wood Furniture Repair Guide
For those little "oops" moments, it helps to know which trick to pull out of your sleeve. This table breaks down some common DIY methods for minor damage, helping you choose the right approach for your specific piece.
| Type of Damage | DIY Method | Best For Which Finish | When to Call a Pro |
|---|---|---|---|
| Shallow Scratch | Rub with a walnut or pecan | Oiled or waxed finishes | If the scratch is deep or on a high-gloss lacquer finish. |
| Light Scuffs/Marks | Furniture touch-up marker | Varnish, shellac, lacquer | When marks are widespread or have penetrated the color layer. |
| White Water Ring | Warm iron and cloth method | Varnish, shellac, some lacquers | If the ring is dark, indicating wood damage, or if the finish lifts. |
| Minor Ink Stain | Dab with denatured alcohol | Sealed finishes like varnish | On porous finishes (oil, wax) or if the stain has set for a long time. |
Remember, these solutions are for minor cosmetic issues. Always test in an inconspicuous area first, and never force a repair that doesn't seem to be working.
When to Seek Professional Help
While DIY repairs are great for small issues, it’s just as important to know when a problem is beyond a quick fix. Trying a major repair without the right skills can devalue a piece, especially heirloom-quality items like our handcrafted Amish furniture.
Consider calling a professional furniture restorer if you see:
- Deep Gouges or Cracks: Damage that goes right through the finish and deep into the wood.
- Extensive Finish Damage: Large areas where the finish is peeling, cracking, or has that "alligatored" look.
- Structural Issues: Wobbly legs, loose joints, or anything that makes the furniture unstable.
- Significant Burns or Dark Stains: Damage that has deeply discolored the wood itself.
Knowing your limits is a key part of caring for wood furniture. For valuable or sentimental pieces, a professional restoration is an investment in their future. Sometimes a piece needs more than just a repair; it might need a modification. For inspiration on how to update a piece, check out our guide on adding doors to a bookcase to see how a simple change can make a big impact.
When to Call a Professional for Restoration in the Albany Area
While tackling minor repairs is a rewarding part of caring for your wood furniture, there comes a time when even the most careful owner should step aside and call a specialist. As a family-owned business in Freehold since 1978, we've always been about empowering our customers. But we're also honest—some jobs just need a professional touch to prevent doing more harm than good.
Knowing where to draw that line is key, especially when you're dealing with valuable custom order furniture or treasured, handcrafted Amish heirlooms. These pieces are meant to be passed down through generations, and a well-intentioned but poorly executed repair can wreck their beauty and value. Sometimes, the best way to care for your furniture is to let an expert handle it.
Signs Your Furniture Needs an Expert
Some problems are more than a touch-up marker or a dab of wax can handle. If you see any of these red flags, it’s a clear sign it's time to find professional help in the Albany Capital Region.
- Deep Gouges or Structural Cracks: Damage that goes deep into the wood itself needs to be properly filled, stabilized, and then finished by an expert who can match the color and sheen perfectly. It’s nearly impossible to get that right at home.
- Wobbly Legs and Loose Joints: If a chair or table feels unstable, that’s a real safety issue. A pro can take it apart correctly, re-glue the joints, and use proper clamps to restore its strength for good.
- Peeling, Cracking, or "Alligatored" Finish: When the finish starts to fail across a large area, it has to be chemically stripped and completely reapplied. That’s a job that demands special equipment and serious safety precautions.
- Significant Water or Heat Damage: Those dark rings or widespread cloudy spots mean moisture has gotten past the finish and into the wood fibers. This almost always requires professional stripping and refinishing to fix.
Our Local Insight: We’ve seen beautiful pieces unintentionally damaged by well-meaning owners trying to fix major issues. The most common mistake is using hardware store wood filler on a deep gouge; it never takes a stain the same way as real wood and often stands out even more after the "repair."
Understanding Your Options: Refinishing vs. Restoring
When you talk to a professional, they’ll probably mention two different approaches: restoration and refinishing. It helps to know the difference so you can make the best choice for your piece.
Refinishing is all about the surface. The process involves stripping off the old, damaged finish, fixing any surface-level dings, staining the wood, and applying a fresh, new protective topcoat. This is the perfect solution for furniture that has a solid structure but a worn-out finish.
Restoration, on the other hand, is a much more delicate and involved process. The goal is to preserve as much of the original piece as possible, including its history and patina. This could mean repairing structural parts, replacing missing veneer with period-correct materials, and meticulously cleaning and conserving the original finish instead of just stripping it off.
If you have a piece with issues that need a closer look, you can always submit a service request to get an expert opinion. Making the right call will ensure your furniture not only looks incredible but also keeps its history and value for many more years.
Your Wood Furniture Questions Answered
We've heard just about every question in the book when it comes to wood furniture care at our Freehold showroom. With our 45+ years of experience, we're here to cut through the noise and give you clear, trustworthy answers. We want to help you care for your beautiful pieces and steer you clear of the common mistakes we see homeowners across the Greater Albany Capital Region make.
This is the kind of practical, neighborly advice we share every single day. It’s all about demystifying the process and giving you the confidence you need to keep your furniture looking its best.
How Often Should I Polish My Wood Furniture?
This one comes up a lot, and the answer really depends on the finish. For hard finishes like lacquer or varnish, you only need to polish a few times a year. Any more than that, and you risk a cloudy, dull buildup. Always, always use a high-quality polish without silicone.
If your furniture has an oil or wax finish, it needs a bit more attention. You'll likely need to reapply the oil or wax every 6-12 months to keep the wood nourished. The best approach is to simply look at your furniture—if it seems a little dull or lackluster, it’s probably time for some care. When you visit us, we can help you identify your finish and recommend the perfect schedule.
Are All-In-One Dusting Sprays Safe for Wood?
We generally tell people to stay away from most aerosol combination sprays. They're often loaded with silicone, waxes, and other additives that, over time, create a sticky, hazy film. The irony is that this film actually attracts more dust.
Even worse, that buildup is a real pain to remove and can cause serious problems if you ever need to have the piece refinished. For day-to-day dusting, a soft, dry microfiber cloth is your best friend. For a slightly deeper clean on a durable finish, a cloth lightly dampened with water is usually all you need.
Can I Use a Vinegar and Oil Mixture to Clean Wood?
This is a popular DIY recipe you see all over the internet, but we strongly advise against it. Vinegar is an acid, and it can dull or even damage certain wood finishes over time, especially more delicate, older ones.
And those cooking oils? They don't actually "feed" the wood. Instead, they can go rancid, leaving behind a sticky residue that becomes a magnet for grime. It’s always safer to use a product specifically formulated for wood furniture or, for durable finishes, a simple solution of mild soap and water on a well-wrung cloth.
Our Pro Tip: The whole point of cleaning is to remove dirt, not to add another layer of something new. When you're in doubt, the simplest method—a clean, damp cloth—is almost always the safest and most effective choice for any sealed finish.
For more expert advice on what's safe, the home improvement resource This Old House has some excellent guidance on what to use and what to avoid, which really reinforces the importance of gentle, proper care.
How Do I Fix a White Ring from a Hot Dish on My Table?
We've all been there! Those dreaded white rings are often just moisture trapped in the top layer of the finish, and the good news is, you can usually get them out.
Start by placing a clean, dry cotton cloth over the stain. Then, using a warm (not hot!) iron, gently press over the cloth for a few seconds at a time. The gentle heat helps the finish release that trapped moisture. Just be sure to check your progress frequently. If you're nervous about trying this on valuable Amish furniture, it's always best to consult an expert so you don't risk causing more damage.
Should I Get Insurance for My High-Value Furniture?
For pieces that are a real investment, like a custom-ordered dining set or an antique heirloom, it's a very wise consideration. Your standard homeowner's or renter's policy might cover furniture up to a certain dollar amount, but it often won't cover the full replacement cost of a high-end item.
Take a look at your policy for specific limits and think about adding a "rider" or a separate policy for valuable personal property. This ensures you're protected against a significant loss from things like fire, theft, or accidental damage. We always recommend this for pieces that aren't just furniture, but true investments in your home's future.
At Tip Top Furniture & Mattresses, our family is dedicated to helping yours find and maintain beautiful, lasting furniture. From custom orders to flexible financing, we offer one-stop shopping with local expertise, making it easy to create a home you love in the Albany Capital Region.