Your Guide to the Perfect Bay Window Valance in 2026
A bay window valance is more than just a piece of fabric. It’s the design secret that frames your view, softens the light, and puts the perfect finishing touch on one of your home's best features. This one detail can completely transform a room, turning a plain window into a stunning focal point.
Finding the Perfect Frame for Your View

The right valance doesn’t just hang there; it elevates your bay window from a simple architectural element to a source of genuine charm. For homeowners all across the Greater Albany Capital Region—from Schenectady and Troy to all over Greene County—a bay window is a treasured part of a home’s character. Think of a valance as the perfect picture frame for the view outside. It can soften hard angles, inject your personal style, and beautifully manage the natural light that fills your space.
At Tip Top Furniture & Mattresses, we've been helping our neighbors do exactly that since our family started the business in 1978. As a local, family-owned business in Freehold, NY, our 45+ years of experience have taught us that the details really do make all the difference. A well-chosen bay window valance is one of those details that truly matters.
It's More Than Just a Pretty Accent
The combination of bay windows and valances has a long history of creating elegant, light-filled rooms. It’s a timeless look for a reason! When bay windows first became popular in the late 19th century, designers quickly realized that adding a valance wasn't just decorative—it could dramatically improve a room's atmosphere.
Today, a modern valance does even more heavy lifting:
- Hides Hardware: It gives you a clean, polished look by neatly concealing curtain rods, brackets, and the hardware for blinds or shades.
- Adds a Pop of Color: A valance is the perfect spot to introduce a fun accent color or a pattern that ties the room together.
- Creates Visual Height: Mount a valance just above the window frame, and you'll trick the eye into thinking the ceiling is higher and the room is more spacious.
- Unifies Your Style: It's the connecting piece that links your window treatments to other fabrics and finishes in the room, like your upholstery, rugs, or even your beautiful Amish furniture.
Our Expert Take: We see a valance as the final piece of the design puzzle. It’s what connects your windows to your furniture, your flooring, and the overall vision you have for your Upstate NY home.
We believe every part of your home should feel like you. Whether you’re putting the finishing touches on a living room or a cozy bedroom, a valance completes the picture. For more ideas, check out our guide on finding the perfect bay window treatments for your bedroom. Our team is always here to help you, from brainstorming design ideas all the way to the final installation.
Choosing Your Valance Style and Fabric
Picking out the perfect bay window valance is a lot like choosing a signature accessory. Is your room calling for the formal elegance of a tuxedo, or the relaxed comfort of a favorite sweater? This single choice really sets the mood for the entire space.
The style you land on will shape the atmosphere of the room. Some designs are crisp and architectural, while others feel soft and romantic. As your local design experts in Freehold, NY, with over 45 years of experience, we've helped countless families across the Greater Albany Capital Region find that perfect finishing touch for their homes.
Finding a Style That Speaks to You
At first glance, the number of valance styles might seem a bit much, but they really boil down to a few key categories. Each one brings its own unique personality to your bay window.
- Board-Mounted Valances: Think of these as a crisp, clean frame for your window. Fabric is stretched over a custom-cut wooden board, creating a sharp, tailored look. They're fantastic for modern or transitional rooms and are ideal for getting a perfect fit on the tricky angles of a bay window.
- Swag Valances: For a dose of classic elegance, you can't go wrong with swags. The fabric drapes in soft, cascading curves across the window, often with "tails" that hang down the sides. This style adds a sophisticated and romantic feel that works beautifully in dining rooms or master bedrooms.
- Balloon or Cloud Valances: Just like their names suggest, these styles feature soft, gathered fabric that poufs out. This creates a full, rounded look that adds a wonderful softness to a room, feeling either traditional or even a little whimsical depending on your fabric choice.
Our Expert Take: A valance isn't just an afterthought; it's a powerful design tool. A straight, tailored board-mounted valance can modernize a room, while a flowing swag can add instant, classic grace. It's about deciding what story you want your window to tell.
The history behind these treatments is fascinating, especially in historic homes like those you see around Albany and Troy. The Victorian era was a huge moment for bay window valances, with them appearing in 70-80% of middle and upper-class homes. A single, elaborate treatment could use up to 25 yards of fabric—a clear sign of their importance in design!
Comparing Bay Window Valance Styles
To make the decision a little easier, we've put together this simple table. It breaks down the most common styles to help you find the right fit for your home's look and feel.
| Valance Style | Best For | Common Fabrics | Design Feel |
|---|---|---|---|
| Board-Mounted | Modern, transitional, or formal rooms needing a clean, structured look. | Cotton, Linen Blends, Performance Synthetics | Crisp, Tailored, Architectural |
| Swag | Traditional, formal, or romantic spaces like dining rooms and bedrooms. | Silk, Faux Silk, Sheer Voiles, Damask | Elegant, Flowing, Classic |
| Balloon/Cloud | Country, cottage, or traditional rooms wanting a touch of softness. | Cotton Prints, Chintz, Lightweight Linen | Soft, Full, Whimsical |
Ultimately, the best style is the one that complements your existing decor and makes you happy every time you walk into the room.
Selecting the Perfect Fabric for Your Capital Region Home
Once you have a style in mind, it's time to think about fabric. This is where the personality of your bay window valance truly comes to life. The material you pick determines not just the look and feel, but also how well it holds up over time. For homes here in Upstate New York, it’s always smart to pick fabrics that can handle strong sun without fading.
Here are a few popular fabric choices we often recommend:
- Cotton: This is a true workhorse. It’s versatile, durable, and comes in just about any color or pattern you can imagine. Cotton holds its shape well, making it a great pick for more structured styles.
- Linen: Known for its beautiful natural texture and airy feel, linen gives a relaxed but still sophisticated look. It drapes wonderfully, which is why it’s a favorite for softer swag styles.
- Silk or Faux Silk: If you’re going for a touch of luxury, nothing beats the beautiful sheen of silk. Real silk can be vulnerable to sun damage, so using a liner or opting for a high-quality faux silk is often a smarter, more durable choice for a sunny bay window.
- Performance Synthetics: Modern polyester and synthetic blends are incredibly durable, resist fading, and are a breeze to clean. They can mimic the look of natural fibers perfectly while offering much better longevity.
At Tip Top Furniture & Mattresses, we know that finding the right material is everything. With our Custom Order program, you get access to a massive library of fabrics from over 50 of our most trusted manufacturers. This means you can create a truly one-of-a-kind look that perfectly matches your existing furniture, whether it's a brand new piece of handcrafted Amish furniture from our showroom or a cherished family heirloom. This level of personalization is at the heart of what we’ve been offering our community since we opened our doors back in 1978.
How to Measure Your Bay Window Like a Pro
That gorgeous, light-filled bay window is a stunning feature in any room. But when it comes to dressing it with a custom valance, the angles and sections can feel a little intimidating to measure. We’ve seen homeowners put it off for fear of getting it wrong, but it’s a project anyone can handle.
Getting the measurements right is the most critical step to making sure your new bay window valance fits like a glove. All you really need is a steel tape measure (the cloth ones can stretch and give you a bad number), a notepad, and a pencil. It also helps to have a friend to hold the other end of the tape.
Breaking Down the Bay Window
Your typical bay window has three parts: one large window in the middle and two smaller, angled windows on each side, sometimes called "flankers." The trick is to measure each one separately and then figure out the angles where they all connect.
First, tackle the big center window. Measure its width from the inside of the left window trim to the inside of the right trim. Jot that down and label it "Center Window Width."
Now, do the same for the two side windows. Measure each one from the inside corner where it meets the center window, out to the very edge of its own trim. Call these "Left Flanker Width" and "Right Flanker Width." Easy enough!
Finding the Angles and Depth
Those angles are what give a bay window its character, and getting them right is non-negotiable for a custom bay window valance. The good news is that most modern bay windows use standard angles, either 135 degrees or 150 degrees. You can grab an angle finder for a perfect read, but sometimes a simpler method works just fine.
Next, you'll need to decide on the depth—that’s how far the valance will stick out from the wall. A standard depth is about 4 to 6 inches. You might go a little deeper if you’re planning to hang blinds or shades underneath it.
This simple infographic outlines the core steps to consider as you move from measurements to final selection.
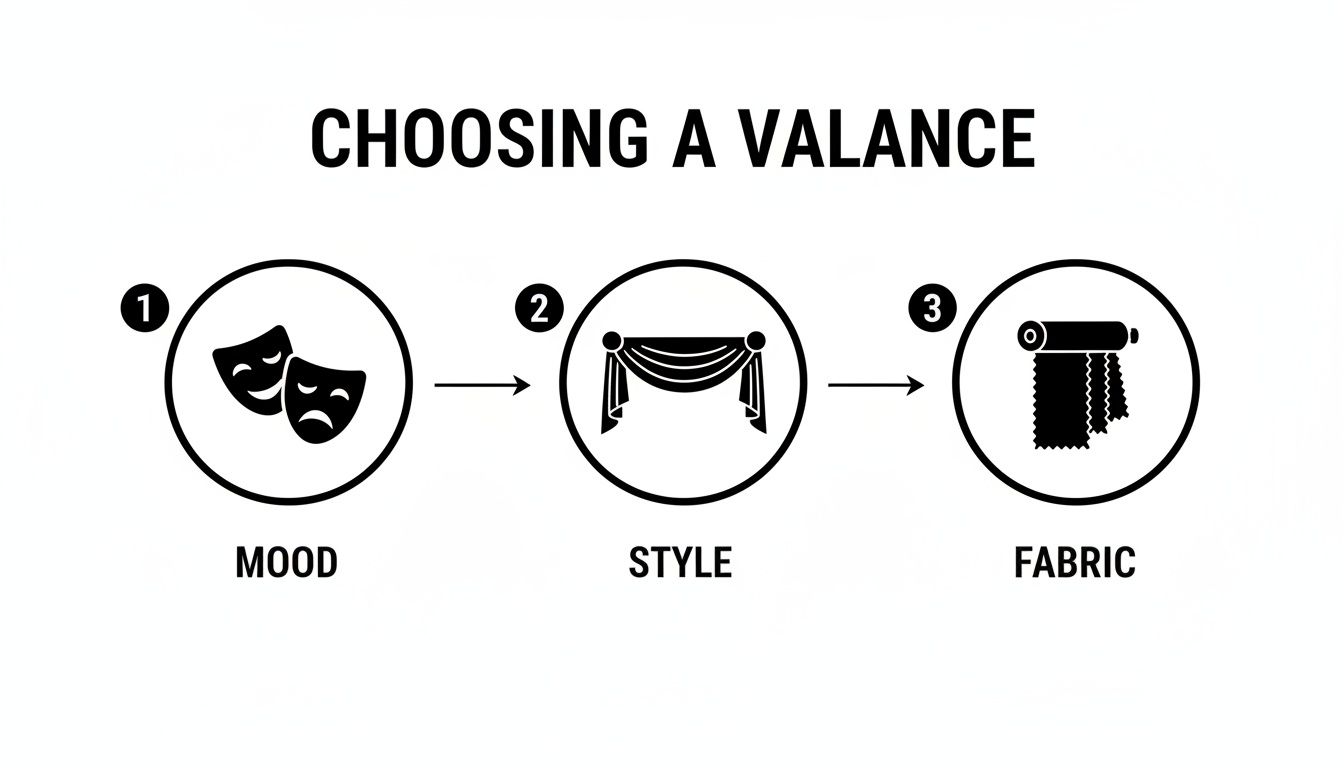
This process visualizes how foundational choices about mood and style directly influence your final fabric selection.
Crucial Mounting and Placement Tips
Where you actually mount the hardware is just as important as the numbers themselves. Over our 45+ years of helping homeowners in the Albany area, we've picked up a few pro tips that make all the difference.
- Measure Thrice, Drill Once: We say it all the time. Double-check your numbers before you even think about drilling. A tiny mistake here can make the whole valance look off-kilter.
- Go High and Wide: Want that designer, high-end look? Mount your hardware 3-6 inches above the window trim. It draws the eye up and makes the whole room feel taller. Extending it a few inches past the trim on each side also makes the window look bigger and grander.
- Mark the Bracket Locations: Once you’ve settled on the height, lightly mark the wall with a pencil where each bracket will go. Use a level to make sure your marks are perfectly straight across all three sections.
After you have all your dimensions, knowing how to calculate fabric yardage is key to making sure you buy enough material for the project.
Our Expert Take: For homes in the Capital Region with older, plaster walls, be sure to use the correct wall anchors for your hardware. Standard screws may not hold securely over time, especially with heavier valance styles.
When to Call in the Experts
Feeling a bit out of your depth? You’re not the only one. While you can definitely measure your windows yourself, we know that nothing replaces the confidence that comes from having an expert do it. For homeowners all over the Greater Albany Capital Region, our Professional Design Services team is here for exactly that.
Since 1984, our designers have offered in-home consultations to take flawless measurements, removing all the stress and guesswork from your project. We can help you pick the perfect style and fabric for your Custom Order and guarantee a perfect fit. You can even check out our guide on how to measure a room for furniture to get more helpful tips for your whole space. Let us handle the details so you can simply enjoy the beautiful result.
Installing Your New Bay Window Valance
You’ve found the perfect bay window valance, and now it’s time for the final, exciting step. This is where it all comes together! Whether you love a good weekend DIY project or you’re a little nervous about drilling into your walls, we’ve put together a straightforward guide to help you get a beautiful, professional-looking result.
The real secret to a smooth installation is all about preparation and a little bit of patience. Before you even think about picking up a drill, gather all your tools in one spot. You'll want a steel tape measure, a pencil, a level, a drill with the right bits, and any wall anchors you might need. And, of course, have all the mounting hardware that came with your rod ready to go.
Tools and Preparation
Go ahead and double-check your measurements one last time. It’s a classic rule we’ve sworn by in our 45+ years of business: "measure twice, drill once." Trust us, this simple habit is the best way to prevent frustrating mistakes and make sure your brackets are perfectly placed for a level finish.
Next, lay out all your hardware pieces. For a bay window, you'll probably have a few rod sections, corner connectors (often called elbows), and several support brackets. Get a feel for how they all fit together before you start marking up your walls. It’s like a chef prepping ingredients before cooking—it just makes the main event go so much smoother.
A Step-by-Step Installation Guide
Hanging a valance on a bay window is all about getting the angles right to create one continuous, flowing line. You want those separate rod sections to look like a single, custom-fit unit.
- Mark Your Bracket Positions: Always start with the center window. Use your pencil and a level to mark where the support brackets will go. A great designer tip is to mount the rod 3 to 6 inches above the window frame. This little trick creates an illusion of height and makes the whole room feel bigger.
- Install the Center Brackets: Drill pilot holes on your marks and then secure the brackets for the center window. If you aren't drilling into a wall stud, this is where you'll want to use the right wall anchors. This ensures your hardware is secure, which is especially important for heavier valances.
- Attach the Corner Connectors and Side Rods: Now, connect the elbow pieces to your center rod, and then attach the side rods. Gently hold the whole assembly up to the wall to mark the positions for the side window brackets. Use your level to make sure everything is straight across all three window sections.
- Secure the Remaining Brackets: Go ahead and install the brackets for your side windows. Once every bracket is securely in place, you can mount the full rod assembly onto them.
- Hang Your Valance: This is the best part! Gently slide your valance onto the rod. If you're using three individual valances, hang them one by one. If you have a single connected piece, it’s really helpful to have a second person to help guide it onto the rod assembly without a snag.
Many of the same principles of leveling and measuring apply to other wall decor. For more helpful tips, you might find our guide on how to hang a picture with precision useful.
Our Local Expertise: In older homes throughout the Albany Capital Region, walls and ceilings can be surprisingly uneven. Always trust your level when marking bracket spots, rather than just measuring down from the ceiling.
The Ultimate Stress-Free Installation
We get it. Not everyone wants to spend their weekend on a ladder with a power drill. For many of our customers in Freehold, Troy, and Schenectady, leaving the installation to a professional is the best part of getting new window treatments.
At Tip Top Furniture & Mattresses, we offer full-service delivery and professional installation for all our products. Our experienced, trusted team will make sure your new bay window valance is installed perfectly, with zero stress or guesswork on your part. It’s the kind of peace of mind our neighbors have relied on for decades. We can even roll the cost of installation into our flexible Financing options, making your entire home project simple and affordable.
Layering Window Treatments for Style and Function

A bay window valance is a wonderful starting point, but the real secret to getting that polished, designer look is layering. Think of your valance like the main piece of a great outfit. By itself, it’s nice, but when you add the right accessories—in this case, other window treatments—the whole look comes together. Layering adds depth, texture, and a huge boost in practical function.
When you pair a valance with blinds, shades, or drapery, you suddenly have total control over light and privacy. This turns your bay window from just a source of light into a truly versatile feature of the room.
Creating Perfect Pairings
The trick to layering is making sure all the pieces work together in harmony, rather than competing for the spotlight. Our design team has been helping families right here in the Greater Albany Capital Region strike that perfect balance since 1984.
Here are a few of our go-to combinations that never fail:
- Valance + Sheer Shades: This pairing is all about softness and elegance. A crisp, board-mounted valance over delicate sheer shades gives you daytime privacy and fills the room with a beautiful, diffused glow.
- Valance + Roman Shades: If you want a look that's both structured and soft, this is it. It’s an incredibly versatile duo that feels right at home in almost any style, from classic traditional to clean contemporary.
- Valance + Blinds: For a look rich in texture, try combining a fabric valance with classic wood or faux-wood blinds. The clean lines of the blinds are a fantastic contrast to the soft fabric of the valance, creating a really dimensional feel.
- Valance + Drapery Panels: To achieve ultimate luxury and drama, frame your bay window with full drapery panels alongside your valance. This is a showstopper in a formal living room or a master bedroom retreat.
From Historic Roots to Modern Homes
Layering window treatments isn't some new-fangled idea. Window valances actually started out in medieval Europe for purely practical reasons. By the Baroque era, though, they had become ornate fixtures found in 85-90% of aristocratic homes. The invention of traverse drapery rods in the 1920s changed the game, and today, valances remain a popular choice in 35-40% of homes with traditional bay windows, especially in historic areas like Upstate New York.
Your One-Stop Design Solution in Freehold
As your local one-stop shop, we make it simple to get that beautiful layered look. Our Professional Design Services team can help you coordinate it all—from the Custom Order valance fabric to the upholstery on a new sofa and even the perfect area rug to pull the whole room together.
Our Expert Take: Layering is how you tell a complete design story. A tailored valance over a woven wood shade can perfectly complement the handcrafted quality of our Amish furniture, creating a warm, modern rustic feel that’s so popular in the Capital Region.
Of course, beyond valances, you might consider other options like automated shades for effortless light control and privacy.
Ready to play with some ideas for your own home? Our Free Online Room Planner is a great tool for visualizing different combinations. Bring your inspiration to our Freehold, NY showroom, and let our team help you create the custom, layered window treatments your home deserves.
Caring for Your Valance & Avoiding Common Mistakes
You've found the perfect valance for your bay window, and it looks incredible. Now, how do you keep it looking that way? A beautiful valance is an investment in your home's character, and a little bit of care goes a long way in protecting it. With over 45+ years of helping homeowners in the Freehold and Albany communities, we've seen what works and what doesn't.
Keeping your fabrics fresh is easier than you think. For most valances, a light pass with a feather duster or the soft brush attachment on your vacuum is all you need. A quick dusting every few weeks prevents dirt from settling into the fibers and keeps those colors looking vibrant.
If you have a little spill or smudge, don't panic! Spot-cleaning is usually the answer. The key is to test your cleaning solution on a hidden spot first, just to be safe. Gently blot the stain with a clean, damp cloth and a touch of mild soap—never rub, as that can push the stain deeper into the fabric.
Avoiding Common Valance Mistakes
Making a confident choice also means knowing the common pitfalls. We've seen a few simple missteps turn a great idea into a design headache. Here are the mistakes we see most often and how you can get it right from the very beginning.
Mistake 1: Forgetting About Scale. A massive, ornate valance might look incredible in a catalog, but it can easily overwhelm a cozy bay window nook. If the valance is too large or fussy, it can make the whole room feel heavy and crowded.
The Fix: Always think about the room's proportions. For smaller bay windows or rooms with lower ceilings, a clean, tailored style like a board-mounted valance is a fantastic choice. The crisp lines add a polished touch without taking over the space.
Mistake 2: The Wrong Fabric for the Wrong Window. That gorgeous silk valance is tempting, but if your window gets direct, all-day sun, it's not a practical choice. Natural fibers like silk and even some cottons can fade and break down over time with too much UV exposure.
The Fix: Be realistic about your fabric. For those sun-drenched windows, we always recommend performance synthetics or durable blends from our trusted manufacturers. These modern fabrics are incredibly fade-resistant and can beautifully mimic the look of natural materials. It’s one of the reasons our USA-made products offer such fantastic long-term value.
Getting the Fit Right for Lasting Quality
By far, the most common—and preventable—mistake is inaccurate measuring. A valance that’s off by even half an inch will throw off the entire look. It disrupts that clean, continuous line that makes a bay window treatment so stunning.
Our Expert Take: Over our four decades in business, we’ve learned that "measure twice, cut once" is the golden rule of window treatments. A perfect fit is the foundation for a professional, high-end look.
This is where getting a little expert help can bring so much peace of mind. Our Professional Design Services team, which we started back in 1984, takes all the guesswork out of the equation. We can visit your home anywhere in the Greater Albany area to take flawless measurements.
And if you have a unique vision or need to coordinate with your treasured Amish furniture, our Custom Order program is the perfect solution. We'll help you create a piece that’s built to last, from the fabric choice to the final installation. Plus, with our flexible Financing options, getting that perfect look for your home is more accessible than ever.
Frequently Asked Questions About Bay Window Valances
We get a lot of great questions from customers in our Freehold showroom and from folks all across the Greater Albany Capital Region. Here are a few of the most common ones we hear, with some practical advice from our 45+ years of experience to help you feel confident about your choices.
How Much Does a Custom Bay Window Valance Cost in the Albany NY Area?
This is usually the first question people ask, and the honest answer is: it depends! The final cost for a custom bay window valance comes down to the size of your window, the fabric you fall in love with, and how intricate the style is.
That said, we truly believe great design shouldn't be out of reach. We pride ourselves on having beautiful options for every budget. And with our flexible Financing options, you can get the project you really want without having to compromise.
Can I Use a Straight Valance on a Bay Window?
While you can technically hang a single straight valance across a bay window, it almost always looks a bit awkward. It just doesn't follow the beautiful angles of the window, which is what makes a bay window so special in the first place!
For that polished, professional look, we always recommend a custom-fit, multi-part valance built specifically for your window's unique shape. It ensures the treatment flows perfectly with the architecture of your room.
Are Valances an Outdated Style in 2026?
Not at all! It’s true that some of the heavy, overly fussy designs from a few decades ago can feel dated. But today's modern valances are sleek, stylish, and a fantastic way to finish a room.
Think clean lines, contemporary fabrics from our Custom Order selection, and tailored board-mounted styles. Our design team loves showing people how the right valance can be the perfect modern touch.
How Do I Choose a Valance to Match My Amish Furniture?
This is one of our specialties! The key to complementing the timeless, natural beauty of Amish furniture is to choose fabrics that have texture and simplicity.
We find that natural materials like linen, cotton, or simple wool blends work beautifully. Sticking to solid colors or subtle, organic patterns lets the heirloom quality of the furniture shine without competing with its incredible craftsmanship.
Ready to find the perfect frame for your view? The expert team at Tip Top Furniture & Mattresses has been helping families across Upstate New York create beautiful homes since 1978. Visit our Freehold, NY showroom to browse our Clearance section and save now, or book your complimentary design consultation today!