Hanging a Large Mirror: A Pro Guide for Albany Homes


A large mirror often spends a few days leaning against the wall before anyone commits to hanging it. That pause makes sense. The mirror looks great, but one wrong anchor, one bad measurement, or one brittle patch of plaster can turn a good decorating decision into a repair job.
Homes across the Albany Capital Region bring different challenges. A newer drywall surface in a suburban bedroom doesn't behave like old plaster in a historic Albany home, and neither of them behaves like brick in an entryway or finished basement. Hanging a large mirror well means thinking past the frame and focusing on the wall, the weight, the hardware, and the finished look once the work is done.
A careful install protects more than the mirror. It protects the wall, the furniture below it, and the people moving through the room every day. It also keeps the mirror from looking slightly off, which is often the problem homeowners notice first.
Table of Contents
- Your Guide to Hanging a Large Mirror Safely
- Gather Your Tools and Assess Your Space
- Select the Best Hanging Hardware for Your Mirror
- A Step-by-Step Guide to Mounting Your Mirror
- Expert Tips for Styling and Placing Your Mirror
- Troubleshooting and Knowing When to Call a Professional
Your Guide to Hanging a Large Mirror Safely
A mirror changes a room faster than almost any other wall piece. It adds brightness, creates depth, and gives a hallway, bedroom, or living room a finished focal point. But a large mirror asks for more respect than a lightweight print or small shelf.
The main mistake isn't always poor drilling. It's rushing the decision before understanding the wall. Drywall can be forgiving if the hardware matches the load and placement. Plaster can chip or crack if drilled the wrong way. Brick can hold beautifully, but only with masonry-appropriate fasteners and a clean, deliberate installation.
Practical rule: The best mirror installation is the one that still looks straight, feels solid, and leaves the wall in good shape years later.
In homes around Albany, Schenectady, Troy, and the surrounding Capital Region, that matters because housing stock varies so much from one neighborhood to the next. A mirror that suits a sleek newer condo may still need a completely different hanging method in an older colonial or farmhouse.
A good approach keeps four priorities in order:
- Safety first: The mirror has to stay put under daily use.
- Wall compatibility: Hardware has to suit the actual surface behind the paint.
- Finish quality: The install shouldn't leave cracked plaster, oversized holes, or a crooked final line.
- Visual balance: The mirror has to feel connected to the furniture and room around it.
That's also why mirror shopping and placement often go together. Size, frame thickness, and intended location affect the install from the beginning. Before choosing a final piece, it helps to confirm room dimensions and furniture scale with a room measuring guide for furniture planning.
Gather Your Tools and Assess Your Space
Preparation does more than save time. It prevents the kind of mistake that leaves extra holes, damaged finish, or hardware that never feels fully secure.
Start with the mirror, not the wall
The mirror itself determines the rest of the job. Frame depth, hanging points, and overall weight all influence which method makes sense.
Large mirrors can weigh up to 40 pounds or more, which is why the hardware can't be treated like an afterthought. One practical drywall approach uses mirror clips secured with EZ anchors at the bottom and mirror mastic adhesive applied in two pumps stacked every six inches across the surface, while framed mirrors with D-rings demand careful layout and matching placement on both sides, as outlined in this mirror hanging discussion with detailed placement examples.
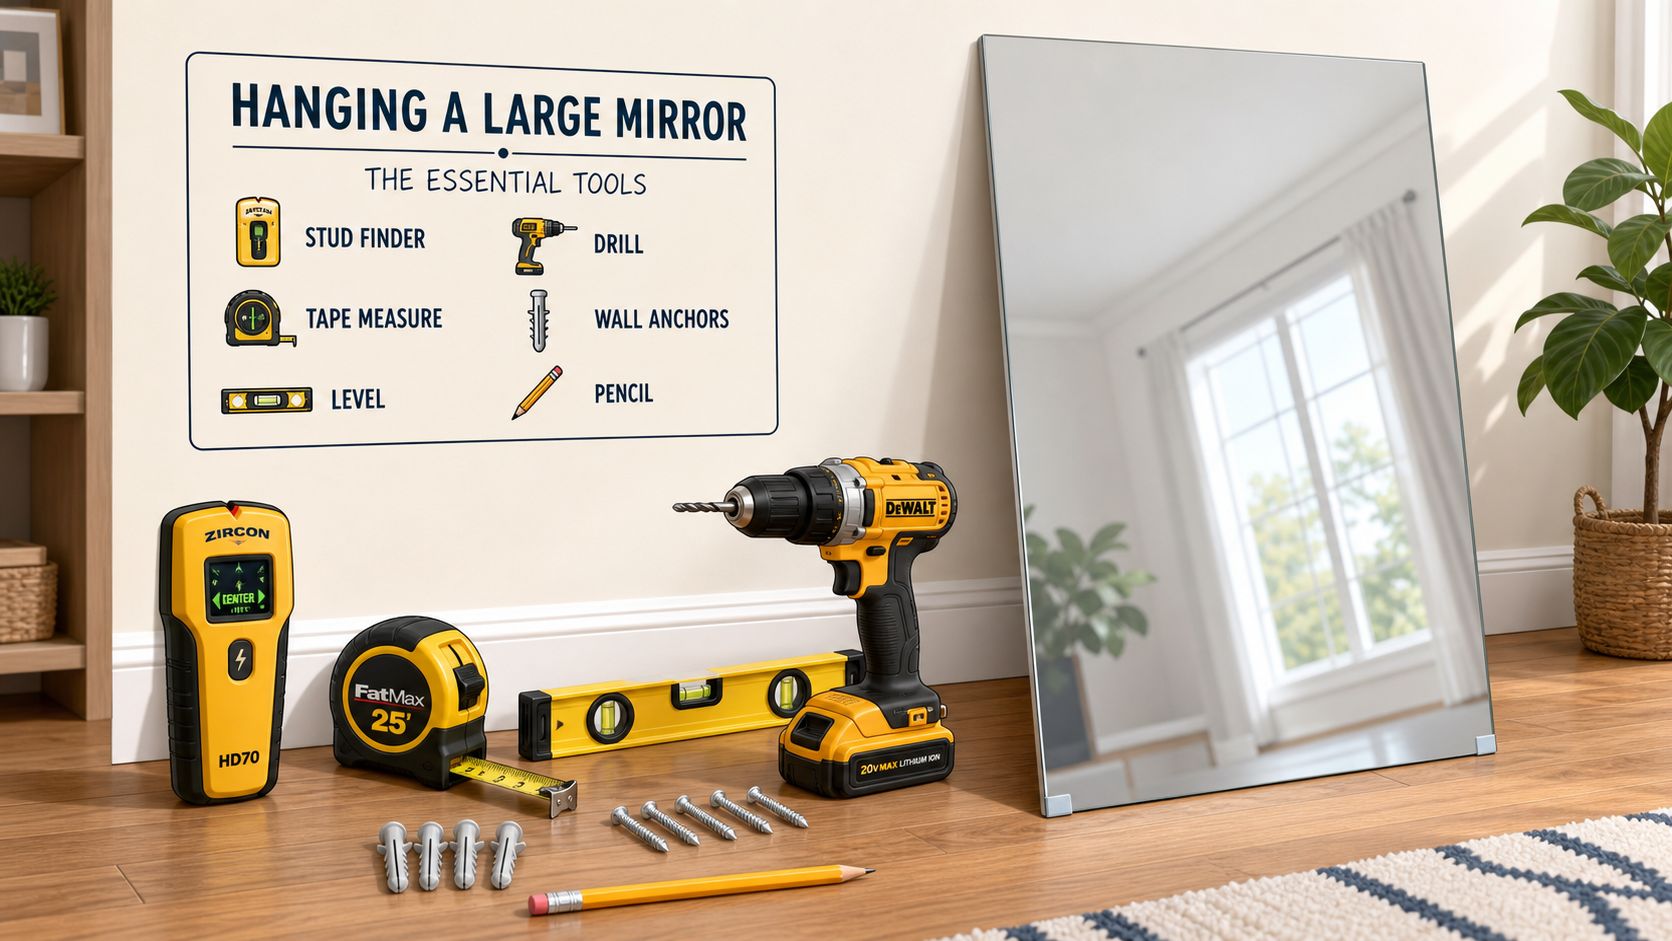
Before buying hardware, gather these basics:
- Stud finder: Best for locating framing behind finished walls.
- Level: A longer level usually makes layout easier on wider mirrors.
- Tape measure: Needed for centering and hardware spacing.
- Pencil: Easier to correct than marker or pen.
- Drill and bits: The correct bit matters as much as the drill.
- Safety glasses: Especially important with plaster or masonry dust.
- Painter's tape: Useful for temporary marks and layout lines.
Homeowners who want a broader refresher on strategic homeowner tool selection may find it helpful before starting, especially if the toolbox has grown piece by piece over time.
Know what kind of wall you have
Many installs frequently go wrong because people assume every painted wall behaves the same. It doesn't.
Drywall is common in newer homes and additions. It's usually easier to scan with a stud finder and easier to patch if a mark ends up in the wrong place. The trade-off is that unsupported drywall has limits, so anchor choice matters.
Plaster is common in older Albany-area homes. It can feel rock solid, but it's less forgiving during drilling. If the bit grabs too aggressively or the installer pushes too hard, the finish coat can chip. Pilot holes and patience matter more here than speed.
Brick or masonry walls can hold a mirror securely, but only when drilled with the right bit and paired with masonry-rated hardware. Brick also forces a more permanent decision, since moving the mirror later is a bigger project than patching painted drywall.
A smooth installation starts with an honest read of the wall. Most hanging problems begin before the first screw goes in.
It's also smart to inspect the intended location itself:
- Check furniture placement: The mirror should relate clearly to the piece below it.
- Look at traffic flow: A crowded hallway or active family room needs extra stability.
- Watch the light: Reflections can improve a room or create glare, depending on the angle.
- Study the surface condition: Old repairs, uneven plaster, or crumbly mortar can change the plan.
Select the Best Hanging Hardware for Your Mirror
Hardware isn't the glamorous part of the project, but it determines whether the mirror feels permanent or precarious. The right system depends on the mirror's construction first, then the wall, then the finish quality expected from the room.
What works best for framed mirrors
D-rings are common on framed mirrors and work well when the frame is sturdy and the measurements are exact. They're practical, familiar, and usually easier for a homeowner to understand at a glance. The weakness isn't the hardware itself. It's sloppy layout.
French cleats give a more secure, more controlled hold for many large mirrors, especially when the mirror is wide or the wall surface is less forgiving. They spread weight more evenly and often help the mirror sit flatter against the wall. On plaster, that cleaner load distribution can make the final result feel steadier.
Mirror clips or channels make sense for some frameless or minimal-profile mirrors. They can also be useful where the installer wants bottom support combined with adhesive on drywall, rather than relying on a decorative frame.
For homeowners comparing basic configurations, this overview of Types of mounting brackets can help clarify the differences in wall-mounted support styles before purchase.
Mirror Hanging Hardware Comparison
| Hardware Type | Ideal Weight Range | Best For Wall Type | Key Benefit |
|---|---|---|---|
| D-rings | Varies by mirror and hardware rating | Drywall, plaster, stud-based installs | Familiar setup and clean look on framed mirrors |
| French cleat | Varies by cleat and wall support | Drywall, plaster, masonry | Broad, stable support and easier leveling |
| Mirror clips | Often used on heavier glass when properly specified | Drywall and masonry, depending on anchor choice | Direct support for frameless or low-profile mirrors |
A separate wall-mounted project, such as a headboard, raises many of the same questions about support points, wall condition, and clean alignment. This guide to attaching a headboard to the wall is useful for understanding how different hardware choices affect both safety and finish.
How wall type changes the decision
Drywall often gives the installer the most flexibility, but only if the load path is sound. If the mirror's hanging points line up with studs, the job gets simpler and stronger. If they don't, the installer has to decide whether to shift the layout, change hardware, or use a drywall-specific combination that includes both mechanical support and adhesive where appropriate.
Plaster changes the conversation. A hardware choice that technically works on paper may still be a poor fit if it requires too much torque, too much surface disruption, or a hard pull on a brittle area. In many plaster installations, broader support systems feel more controlled than narrow-point hanging.
Brick is a durability story and a finish story at the same time. The wall can often take the load well, but the visual tolerance is tighter. Poorly placed holes are harder to hide, and crooked drilling is harder to forgive.
Some mirrors fail because the hardware was weak. Others fail because the hardware was right for the mirror and wrong for the wall.
That's the trade-off homeowners should keep in mind. The goal isn't just getting the mirror up today. The goal is choosing hardware that suits the mirror, respects the wall, and still looks intentional after the room is fully furnished.
A Step-by-Step Guide to Mounting Your Mirror
This is the point where planning pays off. A measured install usually looks effortless when it's done, but there's nothing casual about it.
Mark the layout before touching the drill
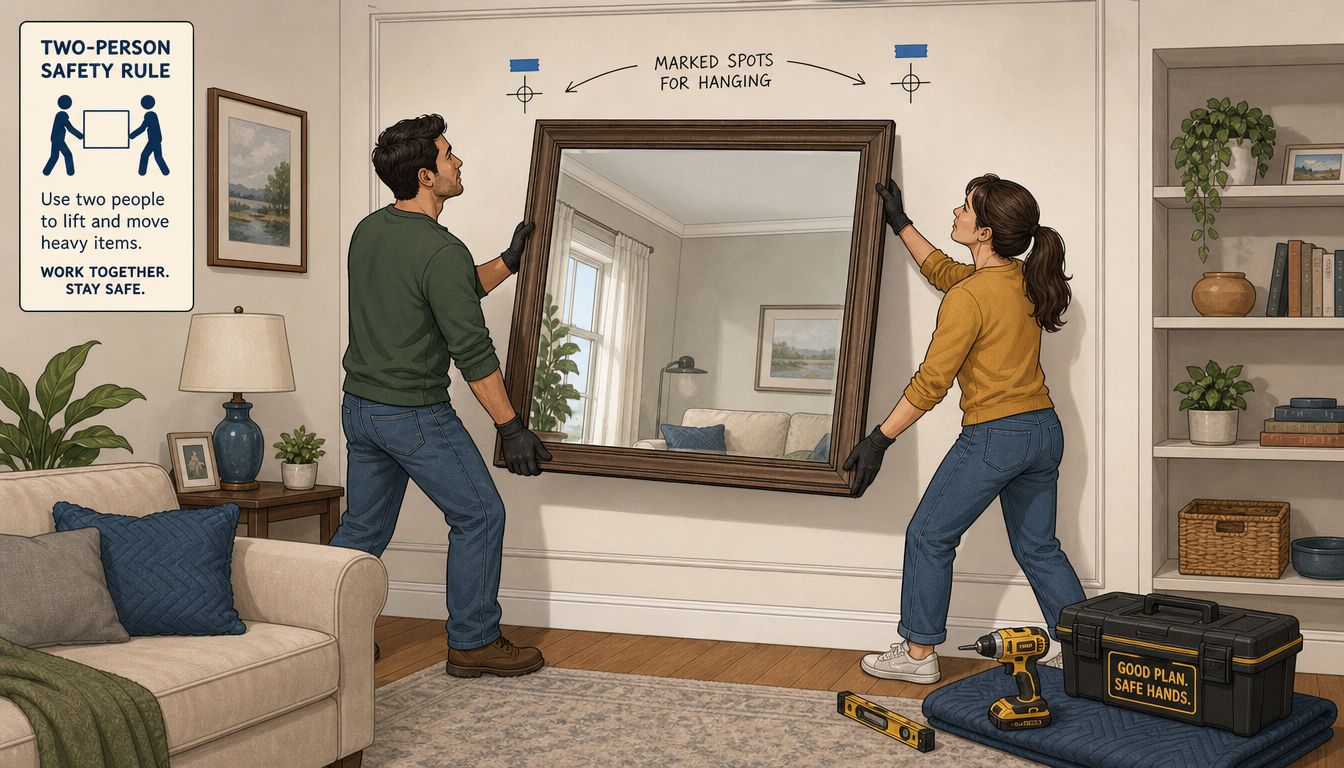
Start by deciding exactly where the mirror belongs on the wall. If it's going above furniture, confirm the centerline of the piece below first. Then transfer that centerline to the wall with light pencil marks or painter's tape.
Check the back of the mirror and identify the true hanging points. Don't guess from the outer frame edge. Measure from the top of the frame down to the D-rings, cleat edge, or clip points.
For heavy mirrors, direct stud anchoring remains the strongest standard. One expert hanging method reports 95%+ success rates when large mirrors are anchored directly into wall studs, with a stud finder used to locate framing members, pilot holes drilled into the stud, and hardware rated for 100+ lbs selected for the install. That same guidance states that drywall anchors alone can fail under 40+ lbs of sustained load and that a 2-person lift is mandatory for mirrors over 50 lbs, according to this step-by-step large mirror hanging guide.
A clean marking process usually follows this order:
- Find and mark the center of the wall area
- Locate studs if the mirror is heavy enough to require them
- Measure the hardware points on the mirror
- Transfer those points to the wall carefully
- Confirm level before drilling
Homeowners who want a separate reference for clean wall layout can also use this step-by-step guide to hanging a picture with precision.
Install the hardware with the wall in mind
For drywall, drill only what the hardware and anchor system requires. Oversized holes create problems fast. If the plan involves studs, drill pilot holes into the framing rather than forcing screws directly.
For plaster, go slower than instinct suggests. A sharp bit, light pressure, and deliberate drilling reduce the chance of chipping around the hole. If the surface starts to crumble, stop and reassess before pushing deeper.
For brick, use the proper masonry bit and keep the drill steady. The cleanest results usually come from taking time on the first hole instead of trying to correct later.
Drill for the wall you have, not the wall you wish you had.
Whatever hardware system is being used, install both sides with the same level of care. A mirror can hang from slightly uneven mounting points and still look wrong from across the room.
Lift, set, and test carefully
Before lifting, clear the area below the mirror. Remove lamps, vases, and anything breakable from the console, dresser, or sideboard underneath. That protects the room and gives the helpers enough space to move without rushing.
Lift with one person on each side when the mirror is substantial, even if the weight doesn't seem extreme. The extra control matters as much as the extra strength. A wide frame can twist during the lift, and that's often when corners get bumped or hardware gets pulled sideways.
Once the mirror is on the wall:
- Check level immediately: Small shifts are easier to fix before the hardware settles.
- Look at the side profile: The mirror should sit evenly and not lean away unexpectedly.
- Test for movement gently: A light, careful pressure test is enough.
- Inspect the wall contact points: Watch for fresh cracking, dust, or anchor movement.
A console or accent table under the mirror often completes the look and also helps visually anchor the installation. For homeowners still finishing the room, the Clearance Corner furniture selection can be a practical place to look for an entry table, sideboard, or accent piece without waiting on a full redesign.
Expert Tips for Styling and Placing Your Mirror
A well-hung mirror should do more than fill wall space. It should improve how the room feels. Proportion, height, and reflection matter more than trend.

Use proportion before decoration
The most dependable placement rule for a large mirror over furniture is to leave 4 to 6 inches between the top of the furniture and the bottom of the mirror frame. A mirror usually looks best when its width is about two-thirds to three-quarters of the furniture width, and the mirror's center often feels most balanced at 57 to 65 inches from the floor, based on average eye level guidance in this mirror placement rule for furniture pairings.
Those numbers matter because they keep the mirror visually connected to the piece below it. Too high, and the mirror floats. Too low, and the arrangement feels cramped.
A few reliable pairings work especially well in Capital Region homes:
- Entry console and mirror: Helps smaller foyers feel brighter and more open.
- Sideboard and mirror in a dining room: Adds depth without crowding the wall.
- Dresser and mirror in a bedroom: Creates a practical focal point with useful reflection.
- Sofa wall mirror: Works best when the frame feels substantial enough to balance upholstery below.
For more ideas specific to transitional spaces, this collection of entryway mirror ideas for everyday homes gives helpful examples of scale and placement.
Make the reflection work for the room
The best mirror placement isn't always centered on the largest blank wall. It's the location that reflects something worth seeing. Natural light from a nearby window can brighten a room beautifully. A mirror facing clutter, a television, or a harsh light source can do the opposite.
That's especially important in older homes where room shapes can be less predictable. Alcoves, off-center fireplaces, and narrow hallways may call for a mirror that is slightly more architectural in feeling, rather than purely decorative.
A mirror doubles whatever it faces. Choose the view as carefully as the frame.
Seasonal styling also helps a large mirror feel integrated instead of static. A console below it can change with greenery, ceramics, books, or sculptural accents. Homeowners exploring artful layered decor may enjoy this guide to incorporating Asian sculptures seasonally, especially when styling an entry or living room vignette around a statement mirror.
A few finishing choices make the whole arrangement stronger:
- Keep object height varied: Low, medium, and taller accents create rhythm below the glass.
- Leave breathing room: Don't crowd the furniture top edge with too many accessories.
- Match visual weight, not just color: A thick wood frame can pair beautifully with solid wood furniture even if tones differ.
- Use symmetry selectively: Balanced lamps work in formal rooms, but looser styling often suits casual spaces better.
Troubleshooting and Knowing When to Call a Professional
Most mirror problems show up quickly. The mirror looks a little off, a bracket doesn't feel fully tight, or the wall starts shedding dust near a fastener. Small issues can often be corrected. Ignoring them is what turns them into bigger ones.
Common problems and simple fixes
If the mirror is slightly unlevel, remove it and recheck the mounting points before widening holes or forcing the hardware. The fix is usually in the layout, not in pushing the frame into place.
If an anchor feels loose, stop using that point as if it's trustworthy. A loose anchor doesn't become reliable with one more turn. It usually means the hole is too large, the wall material is weaker than expected, or the chosen hardware wasn't suited to the surface.
Minor plaster chipping around a hole isn't unusual in older homes. What matters is whether the substrate still feels solid. Surface blemishes can often be repaired after the mirror is secure, but a crumbling attachment point needs a different mounting plan.
A mirror that rocks against the wall may need bumpers or more even support. It can also signal that the wall itself isn't flat, which is common in older homes.
When the safer choice is to call for help
Some jobs stop being good DIY projects once the risks outweigh the savings. That line comes sooner with large mirrors than many people expect.
It's smart to call a professional when:
- The wall material is uncertain: Mixed substrates, patched areas, or hidden masonry can complicate drilling.
- The mirror is unusually large or awkward: Size affects control even before weight becomes the issue.
- The hardware doesn't align with studs: A different support strategy may be needed.
- The plaster is cracking beyond the drill point: That can signal a broader wall integrity issue.
- The installation sits above valuable furniture or in a busy traffic area: Consequences matter.
For households that would rather avoid the installation risk altogether on larger wall pieces, white-glove support can make sense. This guide to furniture stores that deliver and assemble is a helpful starting point when professional setup is part of the plan.
When a project becomes uncertain, stopping is a good decision, not a failure. A large mirror should add confidence to a room, not a lingering worry every time someone walks past it.
For homeowners in Freehold, Albany, Schenectady, Troy, and across the Greater Albany Capital Region, Tip Top Furniture & Mattresses offers the kind of local guidance that makes full-room decisions easier. Since 1978, this family-owned showroom has helped customers match furniture, decor, flooring, and mattresses in one place, with professional design services available since 1984, custom ordering, flexible financing, delivery options, USA-made selections, Amish-crafted furniture, and a strong Clearance Corner for immediate-value finds. For help choosing a mirror, pairing it with the right console or bedroom furniture, or planning a complete room around it, visit the Freehold showroom or explore the online resources and financing options.