
Dresser to Entertainment Center: A Practical DIY Guide

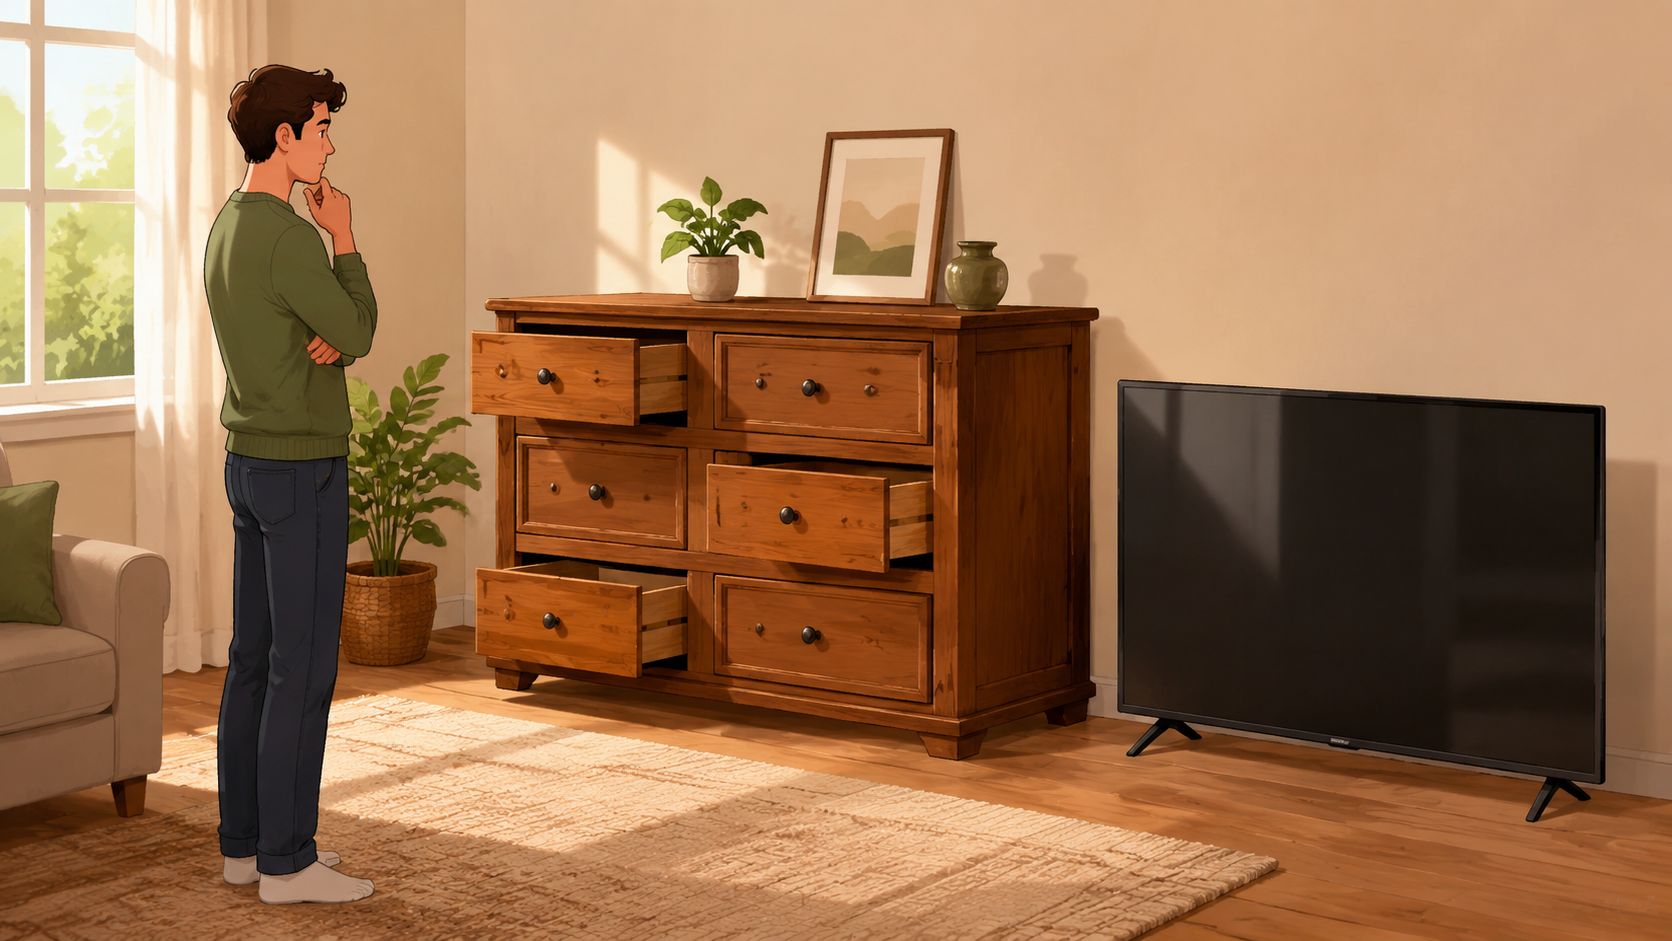
A homeowner stands in the living room, looking at an old six-drawer dresser and a new television still waiting in its box. Replacing the dresser with a purpose-built console is one option, but a well-chosen conversion can provide storage, character, and a more personal finish. The important distinction is that a dresser-to-entertainment-center project isn't a paint makeover. It's a structural and electrical-layout project that must account for stability, ventilation, cable access, and wall anchoring.
Upcycling fits a wider movement toward giving furniture more utility instead of discarding it. Researchers define upcycling as transforming discarded products into items of higher quality or usefulness. In a 2024 European press study, 66% of Millennials said they hadn't heard of upcycling, while 41% of respondents unfamiliar with it said they would consider buying upcycled products, and 37% said they would try upcycling objects or clothing within the next 12 months. The study's overview of reuse and upcycling helps explain why a dresser conversion appeals to households seeking functional, customized furniture.
Why a Dresser Can Be the Perfect Entertainment Center
A low, wide dresser already resembles the basic proportions of a media console. Its broad top can support a television, its deep carcass can hold components, and its drawers can organize remotes, controllers, discs, blankets, and other living-room items. That existing volume often makes a dresser more useful than a narrow television stand with decorative doors but little usable storage.
The strongest candidates are low and wide dressers with sound joints, a level base, and enough interior depth for the equipment being installed. A furniture-repurposing guide also identifies low, wide dressers as a suitable choice because they offer a stable television platform and interior room for media devices, while emphasizing that the furniture should be measured before it is moved or purchased. This dresser-repurposing guide provides useful context for assessing room fit and doorway clearance.
Stability and airflow decide whether the project works
Two engineering concerns separate a successful conversion from an attractive headache.
Stability comes first. A television raises the visual and physical load above the dresser, and open drawers can shift weight forward. The completed unit needs reinforcement, a level footprint, and a proper wall connection. Pediatric safety guidance recommends anchoring televisions and furniture to the wall, and warns against using a dresser as a television stand because an open drawer can help pull the unit forward. Nationwide Children's furniture tip-over guidance reports that a child in the United States is treated for a furniture or television tip-over injury every 46 minutes.
Ventilation matters just as much. Streaming boxes, game consoles, receivers, and amplifiers generate heat. A closed wooden cabinet can trap that heat, especially when the backing remains intact and devices are packed tightly together. Larger rear openings, ventilated shelves, or one intentionally open drawer bay may protect electronics better than a completely concealed design.
There are trade-offs. Drawer openings may need to be removed or converted into cabinet doors, the backing may require careful cutting, and cord routes must be planned before finishing. A dresser versus chest of drawers comparison can also help clarify which type of case furniture offers the right storage pattern.
A measured project follows a clear order: choose a structurally sound dresser, remove unnecessary parts, reinforce the cabinet, create cable and airflow openings, dry-fit every device, finish the surfaces, and anchor the furniture and television. Skipping the planning stage is what turns an otherwise practical reuse project into a wobbly flip.
Choosing the Right Dresser for the Job
The best dresser isn't necessarily the prettiest one in a secondhand listing. Before any drawer comes out, the furniture should be evaluated as a load-bearing cabinet with a specific television and equipment package.
Check the dimensions before checking the finish
Five inspections usually reveal whether a dresser is worth converting:
- Height: The television should sit near seated eye level rather than forcing viewers to look upward. A practical starting range for the screen center is roughly 42 to 48 inches from the floor, so dressers around 28 to 32 inches high often pair comfortably with 55- to 65-inch screens. Those dimensions are design guidance, not a substitute for measuring the room and seating.
- Width: The top should be at least as wide as the television base or mounting footprint, with visible clearance at both sides. A screen that nearly fills the top can make the unit look unstable, even when the structure is sound.
- Depth: A carcass of at least 16 inches gives receivers, cable boxes, and soundbars more room to sit safely inside the case rather than hanging over the front or back.
- Carcass integrity: Slide every drawer, inspect the rails, press gently against the corners, and lift one side of the dresser slightly. Wobbling joints, cracked rails, loose backs, and swollen particleboard indicate repair work before conversion.
- Material and weight: Solid wood and quality plywood generally provide a stronger foundation than thin, moisture-damaged fiberboard. The TV, equipment, shelves, and hardware all contribute to the final load.
The furniture should also fit the path into the room. Doorways, stair turns, baseboards, outlets, and wall length can make a seemingly suitable dresser impractical. A measurement list for the television, receiver, game console, soundbar, power strip, and ventilation openings prevents guesswork later. More general guidance appears in these considerations for buying chests, dressers, and cabinets.
Dresser selection checklist by TV size
| TV Size | Min Dresser Width | Ideal Dresser Height | Min Dresser Depth | Suggested Load Capacity |
|---|---|---|---|---|
| 55 inches | Measure against the TV base and allow side clearance | 28 to 32 inches | 16 inches | Confirm against the TV and component weights |
| 65 inches | Measure against the TV base and allow side clearance | 28 to 32 inches | 16 inches | Confirm against the TV and component weights |
| Larger screens | Use the television footprint and room scale | Choose by seated eye level | Measure every device | Seek professional evaluation for unusually heavy loads |
The table avoids assigning an invented universal load rating. The actual requirement depends on the television, components, reinforcement, material, and wall connection. A dresser that feels sturdy under ordinary bedroom use may still need internal bracing before it becomes a media cabinet.
Preparing and Modifying the Dresser
Preparation determines whether the finished piece looks intentional. Empty every drawer, remove pulls and other hardware, and place the dresser on a flat work surface. If drawer fronts will become doors, label each front and its original position so gaps and grain patterns remain consistent.
The drawers designated for open component bays should come out completely. Remove the boxes, then unscrew or carefully pry away the glides and remaining hardware. Leaving loose metal tracks behind creates snag points for cables and makes later shelf installation harder.

Open the back before cutting the front
Most conversions need a section of thin MDF or plywood backing removed. Mark the area for power strips, HDMI cables, speaker wire, and service access. A jigsaw works well after starter holes are drilled inside the marked corners, while a scoring knife and controlled snapping can work on thin panels. Sand every cut edge and reinforce the remaining back perimeter so the carcass doesn't rack.
Before cutting a large opening, place the actual equipment inside the empty cavity. Mark rectangles for receivers, consoles, and ventilation grilles based on those devices, not on assumptions. Component fronts need room for buttons and sensors, while rear panels need enough space for plugs and cable bends.
A sturdy conversion normally benefits from:
- A full-width cleat or plywood shelf: This spreads television weight across the top structure instead of concentrating it over a weak span.
- Interior corner braces: These reduce movement where the sides meet the top and bottom.
- A level base: Shim the dresser before anchoring it so the television won't lean and doors won't drift open.
- Clean shelf supports: Drill level support holes or install fixed cleats so shelves cannot twist under equipment.
Builders new to furniture modification may find a practical guide to the best beginner woodworking tools useful when assembling a basic kit. The essential principle is controlled cutting, accurate measurement, and safe handling rather than collecting every available tool.
Dry-fit the television, shelves, power strip, receiver, console, soundbar, and cables before applying paint or stain. The wood furniture refinishing guide becomes more useful after the structure and layout have been proven.
Cable Management, Ventilation, and Device Fit
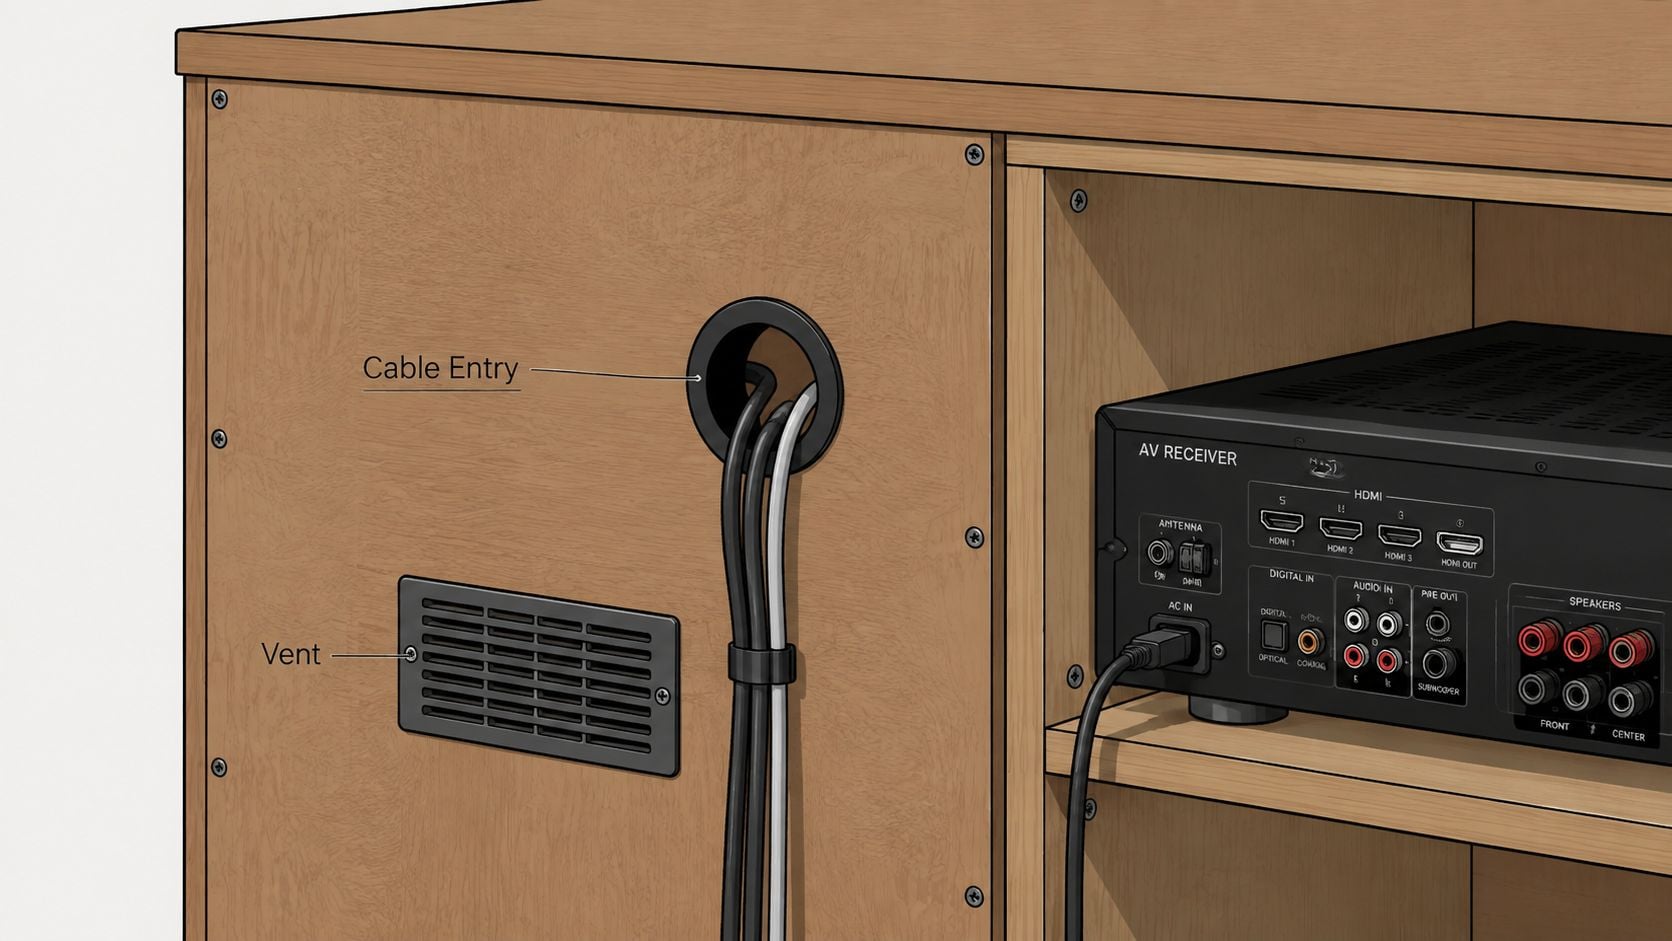
A finished media cabinet should allow cables to move through the case without pulling on ports or blocking drawers. A practical layout begins with a 1.5-inch grommet hole through the rear panel for bundled power and HDMI cables, followed by a second pass-through near the base for cords running toward the floor outlet.
The openings should be placed after measuring the equipment. A hole directly behind a power socket may be difficult to reach, while a low opening can keep the main bundle out of sight. Rear access also makes future troubleshooting possible without removing the television from the furniture.
Keep bundles flat and serviceable
Adhesive cable clips, lacing bars, and zip-tie anchors can hold wires against the interior wall. Cables shouldn't be cinched so tightly that a technician can't identify or replace one. Leave enough slack near each device for cleaning, unplugging, and moving the component forward.
A useful arrangement separates power cords from signal cables where the cabinet allows it. Labeling both ends of each cable also saves time when the furniture is rearranged. The furniture measuring guide is helpful before drilling because it encourages recording the actual interior dimensions rather than relying on exterior measurements.
Treat heat as a design constraint
Solid-wood dressers can hold heat quickly when their backs and fronts are closed. A 6-by-4-inch vent slot above an amplifier or gaming console location provides a deliberate escape route, and a quiet 80 mm USB cabinet fan rated for AV use can help move warm air through the enclosure. These dimensions are practical design targets, so the final opening should still be adjusted to the furniture and device layout.
Keep two inches of clearance on every side of enclosed equipment and three inches behind receivers and cable boxes where plugs and airflow need room. Devices should not touch the back panel or sit directly against one another.
Practical rule: The heaviest component belongs on the lowest shelf. Lower placement improves the center of gravity and leaves lighter streaming devices on higher shelves.
Some projects look cleaner with every bay closed. That isn't always the most reliable arrangement. An open drawer cavity, ventilated shelf, or partially removed backing may keep equipment cooler and make service access far easier.
Anchoring, TV Placement, and Safety Essentials
The conversion isn't finished when the paint dries. It isn't finished when the television turns on. It's finished when the furniture, screen, cables, and hardware remain secure under normal household use.
A dresser supporting a flat-screen television can become top-heavy, especially when a child opens a drawer, climbs on the furniture, or pulls a cord. The Consumer Product Safety Commission's Anchor It campaign update reports that 39% of fatal tip-overs involving a television alone or with furniture from 2013 through 2023 involved a child climbing on the furniture or television. The same source notes that a separate annual report found 46% of tip-over incidents involved only furniture.
Use the wall as part of the structure
The dresser's rear rail deserves inspection before hardware is selected. Thin Masonite or a single line of weak screws isn't an adequate anchoring surface. Add a 1-by-2 brace across the interior top when necessary, fastening it into sound structural material.
A practical safety setup can include:
- Two heavy-duty L-brackets or a furniture anti-tip strap: Select hardware rated for the actual finished load, not just the empty dresser.
- Wall-stud attachment: Use 3-inch lag screws into studs where the wall construction permits. Drywall-only anchors aren't an equivalent substitute for a stud connection.
- Television restraint: Secure the TV separately when the design or manufacturer hardware allows it. Anchoring the dresser alone doesn't prevent the screen from sliding or tipping.
- Cable strain relief: Keep cords from pulling against ports or forming a tempting loop.
- Cord covers: Route and secure cords so children and pets can't grab or trip over them.
The screen should sit with its base close to the dresser's rear edge without hanging beyond the support surface. Its center should be positioned within roughly 10 degrees of seated eye level, then checked from the actual sofa rather than from a standing position. This guide to finding an optimal TV position can help coordinate height, viewing angle, and room layout.
Wall anchoring is a necessity in a home with children. CPSC guidance also recommends securing dressers and televisions and keeping tempting items out of reach. Families in the Greater Albany Capital Region should treat this as a core construction requirement, whether the dresser is newly purchased, inherited, or found secondhand.
Finishing Touches, Storage, and Styling
The final details determine whether the piece reads as finished furniture or as a dresser with a television balanced on top. Drawer fronts can become hinged doors over an enclosed media bay, creating a cleaner appearance while retaining the original furniture character. Soft-close hinges are a worthwhile upgrade because they reduce slamming and keep the fronts aligned.
Make the exterior intentional
A bonding primer helps paint adhere to previously finished surfaces. Chalk paint can create a matte farmhouse appearance, while gel stain can emphasize visible wood grain when the substrate is suitable. The finish should match the room rather than conceal every sign of age. A carefully repaired older dresser can provide more character than a perfectly uniform new cabinet.
The interior deserves attention, too. Peel-and-stick acoustic felt can reduce buzzing or vibration around equipment, while drawer dividers keep controllers, remotes, charging cables, and streaming accessories from becoming one tangled pile. Storage works best when each category has a consistent location.
Style the top without crowding it
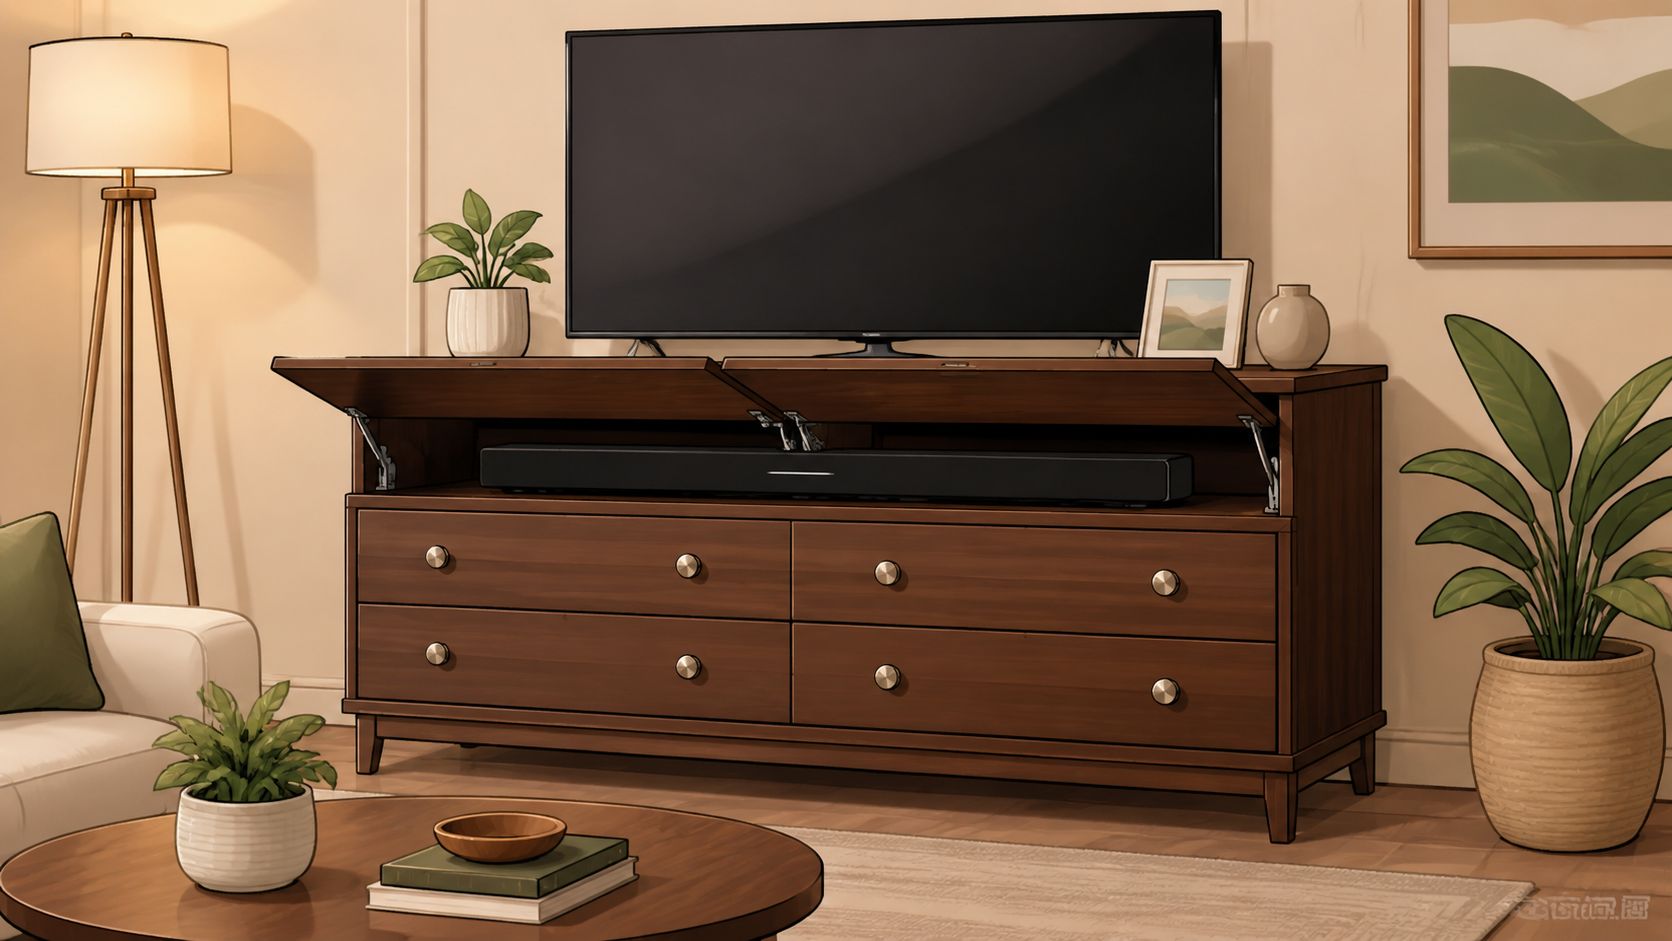
The television needs visual breathing room. A low-profile plant, a soundbar, and one carefully chosen piece of art can frame the screen without competing with it. Tall accessories near the television make the top feel crowded and can interfere with viewing or ventilation.
New pulls often create the strongest visual change for the least disruption. Brushed brass can warm a traditional finish, while matte black suits a restrained modern palette. The hardware should align with hinges, nearby lighting, and other room details so the converted dresser feels connected to the wider space.
The best styling decisions also preserve access. Doors should open fully, ventilation slots should remain clear, and the rear panel should be reachable when a device needs replacement. Good appearance supports daily use rather than hiding problems behind a polished facade.
When to DIY, Buy a Stand, or Go Custom
Three routes can produce a capable entertainment center, but they solve different problems. A full DIY dresser conversion offers the most character when the existing piece is structurally sound and the household has time for cutting, sanding, finishing, and anchoring.
A purpose-built stand is more predictable when equipment needs a precise fit or when a matching living-room collection matters. It can also make sense when warranty coverage, quick delivery, or a ready-made cable layout outweighs the personal value of reuse.
Custom furniture becomes the stronger option when the room or television creates constraints that a standard dresser can't solve. That includes unusual wall dimensions, a very large or top-heavy screen, integrated lighting, hidden cable channels, or a design that must align with existing millwork. A custom order can also specify wood, finish, dimensions, door style, and storage layout instead of forcing the equipment into an inherited carcass.
A practical comparison
| Path | Works well when | Main drawback |
|---|---|---|
| DIY conversion | The dresser is solid, the room layout is flexible, and the builder has time | Structural, finish, and safety mistakes remain the builder's responsibility |
| Purpose-built stand | Component fit, quick availability, coordinated furniture, or warranty support matters | The design may offer less character or customization |
| Custom furniture | The wall, television, equipment, or millwork requires exact dimensions | The process requires planning and a higher commitment than reuse |
A carpenter or custom shop should be considered for load-bearing concerns above 80 pounds, built-in wall alignment, stone or quartz top integration, and anchoring in a rental where wall modifications require approval. These situations introduce structural or property constraints that shouldn't be improvised with light-duty hardware.
A related kitchen refinishing GTA guide can provide useful perspective on how professional refinishing decisions differ from a casual paint refresh, even though a media dresser has its own structural and ventilation requirements.
Before committing, evaluate:
- Budget: Include hardware, plywood, ventilation parts, finish, and delivery or transport.
- Timeline: Allow time for drying, curing, troubleshooting, and anchoring.
- Skill level: Cutting a clean opening is different from assembling a safe load-bearing cabinet.
- Room constraints: Check wall length, seating sightlines, outlets, doorways, and rental rules.
- Long-term plans: A custom or professionally finished piece may serve better if the home could be sold or remodeled later.
For households in Freehold, Albany, Schenectady, Troy, and the wider Capital Region, Tip Top Furniture & Mattresses provides another route through its living-room furniture, entertainment consoles, custom ordering, professional design services available since 1984, and furniture from more than 50 trusted manufacturers. Its selection also includes USA-made mattresses, Amish furniture handcrafted in the USA, flooring, décor, flexible financing, delivery, and clearance furniture, allowing a room project to be coordinated beyond the television wall.
Visit Tip Top Furniture & Mattresses at the Freehold, NY showroom to compare purpose-built entertainment furniture, explore custom-order possibilities, or discuss a dresser conversion with local design professionals. Customers from Albany, Schenectady, Troy, Greene County, and the surrounding Capital Region can also ask about delivery, flexible financing, Amish furniture, flooring coordination, and Clearance Corner options for completing the room.