A Guide to Attaching a Headboard to the Wall for a Secure, Stylish Finish
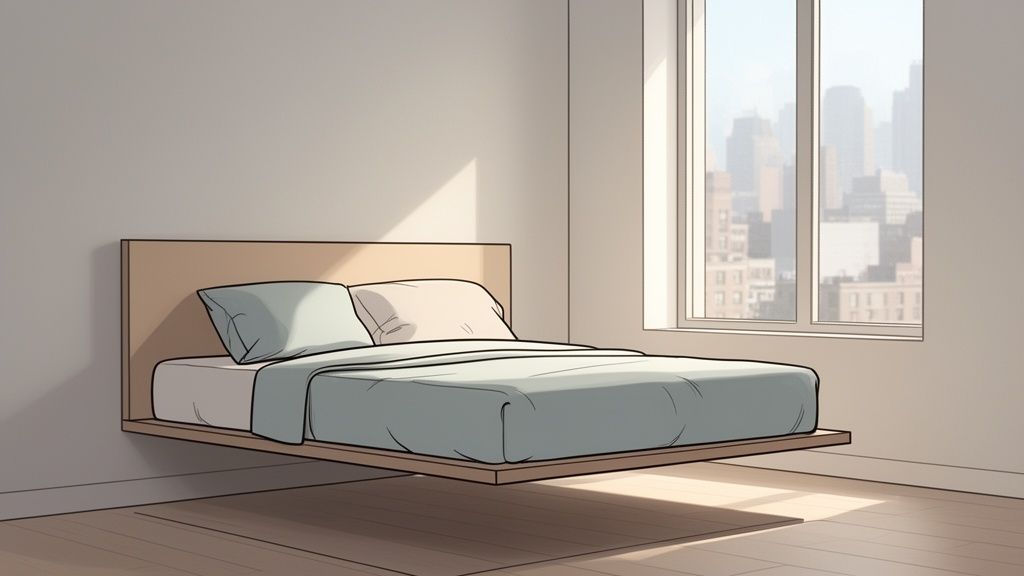
Attaching a headboard directly to the wall is one of our favorite tricks. It’s a straightforward project that completely eliminates wobbling, creates a clean 'floating' look, and saves precious floor space. You get unbeatable stability, especially for those heavy or oversized headboards, and a guarantee that your bedroom centerpiece will stay put without damaging your bed frame or the wall. As a family-owned business serving the Capital Region since 1978, we've helped countless neighbors achieve this professional finish.
Why Wall-Mounting Your Headboard Is a Smart Move for Your Albany-Area Home
If you’ve ever been jolted awake by a headboard thumping against the wall with every little movement, you already understand the biggest reason to secure it. For homeowners all over the Greater Albany Capital Region—from modern Troy apartments to historic Greene County houses—attaching a headboard to the wall isn't just a quick fix. It's a genuine design upgrade. Here at Tip Top Furniture & Mattresses, our family has seen since 1978 how this simple change can completely transform a bedroom.
Unlocking Stability and Style
There's no denying that a wall-mounted headboard has a high-end, built-in look that makes a bedroom feel more polished and put-together. This is especially true for the substantial, heirloom-quality pieces we love, like the solid wood Amish furniture we specialize in. Anchoring these heavy headboards directly to wall studs gives them support that a simple bed frame just can't match, ensuring your investment is both beautiful and secure.
It's not just about aesthetics, though—it’s also incredibly practical. This method solves the common issue of uneven floors, ensuring your headboard stays perfectly level. It’s also a cornerstone of modern, space-saving design, making it a popular choice for homes in Albany, Schenectady, and Troy where maximizing space is key.
The Benefits of a Wall-Mounted Headboard
Deciding on attaching a headboard to the wall brings some fantastic advantages to your bedroom.
- Enhanced Stability: Say goodbye to all that annoying shifting, rattling, and thudding. A direct wall mount means your headboard is completely stationary and quiet.
- Maximized Floor Space: That "floating" look actually frees up a few inches of floor space. It makes the room feel bigger and a whole lot easier to clean underneath. For anyone with a compact room, check out our guide on other stylish solutions for small bedrooms.
- A Professional, Finished Look: A wall-mounted headboard just looks custom and intentional, elevating the entire room's design. It’s a little detail our Professional Design Services team has been recommending to clients since 1984.
Gathering Your Tools and Choosing the Right Hardware
Before you even think about lifting that headboard, a little prep work will save you a world of headaches. With over 45 years of experience helping folks in the Greater Albany area from our Freehold showroom, we’ve learned that having the right tools and hardware ready to go is the secret to a smooth project.
Let’s start with your toolkit. You don’t need a professional-grade workshop, but a few items are absolutely essential for a secure mount. Grab a quality power drill with a good set of drill bits, a stud finder, a tape measure, a pencil, and a level. These are your best friends for this job.
Pro Tip from Freehold: Use painter's tape to mark your measurements directly on the wall. It’s easy to see, won’t leave any marks, and peels off cleanly when you're done. Our design team uses this trick all the time for damage-free installations.
Selecting the Best Hardware for Your Wall
The hardware you choose is just as critical as your tools. The right screws and anchors need to match your wall type and, most importantly, be strong enough to support the headboard’s weight. After all, a lightweight fabric headboard has very different needs than one of our solid, USA-made Amish headboards.
A secure installation starts with knowing the different types of wall mounting brackets available. For really heavy pieces, we often recommend French cleats because they do an incredible job of distributing weight and create a sturdy, invisible lock.
If you have standard drywall, your best bet is always to mount directly into a wall stud. But what if the studs just aren't where you need them? In that case, heavy-duty drywall anchors like toggle bolts are a reliable backup plan. Many of the same principles apply to other wall projects, too. Our step-by-step guide to hanging your picture with precision shares more helpful tips on finding studs and choosing the right anchors for your walls.
Choosing the Right Wall Mounting Hardware
To make things a bit clearer, we put together this quick comparison of the most common hardware options. And remember, if you purchase a headboard from our Freehold showroom, our team is always here to advise on the best method for your specific piece and home.
| Hardware Type | Best For | Weight Capacity | Tip Top Expert Advice |
|---|---|---|---|
| Screws into Studs | Drywall, Plaster | High | This is the gold standard for security. Our trusted local experts always try to locate studs first for the strongest possible hold. |
| Toggle Bolts | Drywall (No Studs) | Medium to High | These anchors expand behind the drywall, providing excellent grip when you can't hit a stud. |
| French Cleat System | Heavy Headboards, All Wall Types | Very High | Ideal for heavy Amish furniture. It creates a secure, interlocking mount that distributes weight perfectly across several studs. |
| Masonry Screws & Anchors | Brick, Concrete | Very High | Requires a hammer drill and specialized bits but offers an extremely robust hold on hard surfaces. |
Taking a few minutes to choose the right hardware from the start will give you a secure mount and total peace of mind for years to come.
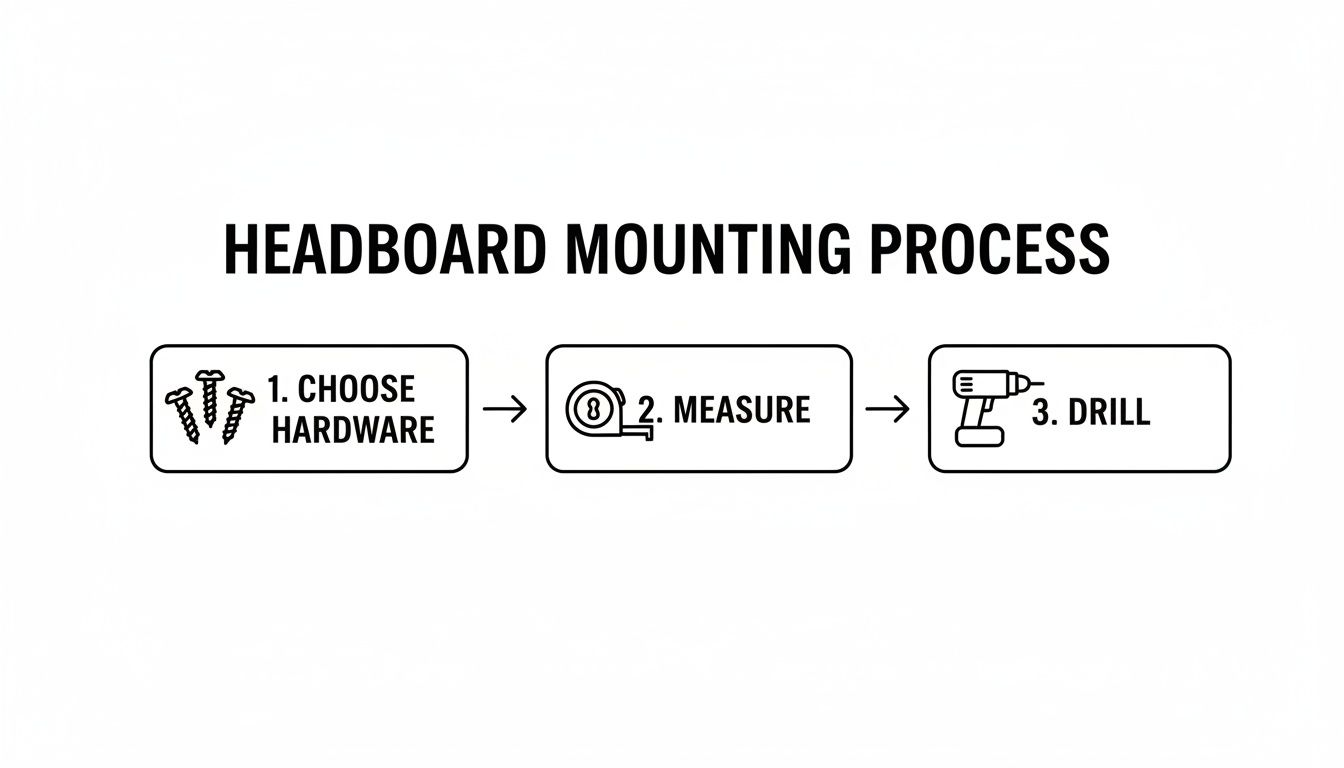
Your Secure Headboard Installation Guide
Alright, you've got your tools and hardware ready to go. Now comes the part where we get that headboard securely on the wall. This is where a little bit of precision separates a wobbly headboard from a solid, professional-looking installation. We're going to walk you through the same methods our own design consultants have been using in homes from Albany to Greene County since 1984.
Getting Your Measurements Just Right
First things first, let's figure out the perfect height. There's no single "right" answer, but a fantastic rule of thumb is to position the bottom of the headboard 2 to 4 inches above the top of your mattress. This closes that annoying gap where pillows always seem to disappear, but it keeps the headboard high enough to be a beautiful focal point.
To nail this, push your bed (mattress and all) right up against the wall where it will live. Take a pencil and make a light mark on the wall right at the top of the mattress. From there, measure up to find your sweet spot and mark your headboard's bottom line. Grab your level and extend that line so you have a perfectly straight guide. Using a strip of painter's tape is a great trick for a clear, damage-free line to follow.
Getting dimensions right is a common trip-up, but you can learn more from our guide on how to measure furniture to side-step those mistakes.
Locating the Wall Studs
This is probably the single most important step for a strong, secure mount. You should always aim to anchor into wall studs whenever you can. Drywall alone just won't cut it; the studs provide the real structural support you need, especially for a heavier piece of Amish furniture.
Fire up your electronic stud finder and sweep it across the area where your headboard will go. When it beeps, mark the center of each stud with your pencil.
Now, what if your headboard's pre-drilled holes don't line up with the studs you found? Don't panic. This happens all the time in both new construction and historic Capital Region homes. A fantastic workaround is using a French cleat, which we mentioned in the hardware section. A cleat is basically a long rail that you can securely fasten into several studs, giving your headboard a solid anchor to hang from.
Prepping and Attaching
With your wall marked and your studs located, you're ready to get the headboard attached. If your headboard doesn't already have holes for wall mounting, you'll need to add them. This is also when you'd attach any mounting brackets or one half of your French cleat system to the back of the headboard.
Here's how to bring it all together for the final install:
- Drill Pilot Holes: At your marked stud locations on the wall, drill your pilot holes. Make sure the drill bit is just a little bit smaller than the diameter of your screws. This ensures the screw will have plenty to bite into for a tight grip.
- Position the Headboard: You'll want a helper for this part. Carefully lift the headboard into place, lining up its mounting holes with the pilot holes you just drilled.
- Secure the Screws: Drive your mounting screws through the headboard and into the wall studs, but don't tighten them down completely just yet.
- Do a Final Level Check: Place your level on top of the headboard one last time. If it needs a slight adjustment, you can do it now before fully tightening all the screws and calling it a day.
This simple flow—hardware, measuring, drilling—is the key to a job well done.
Taking your time with each of these phases is what guarantees a secure result that you can be proud of for years to come.
At Tip Top, we believe in perfect fits. If you want a headboard designed specifically for wall mounting and tailored to your room, explore our Custom Order page. We can create a piece that matches your exact vision, from style to finish.
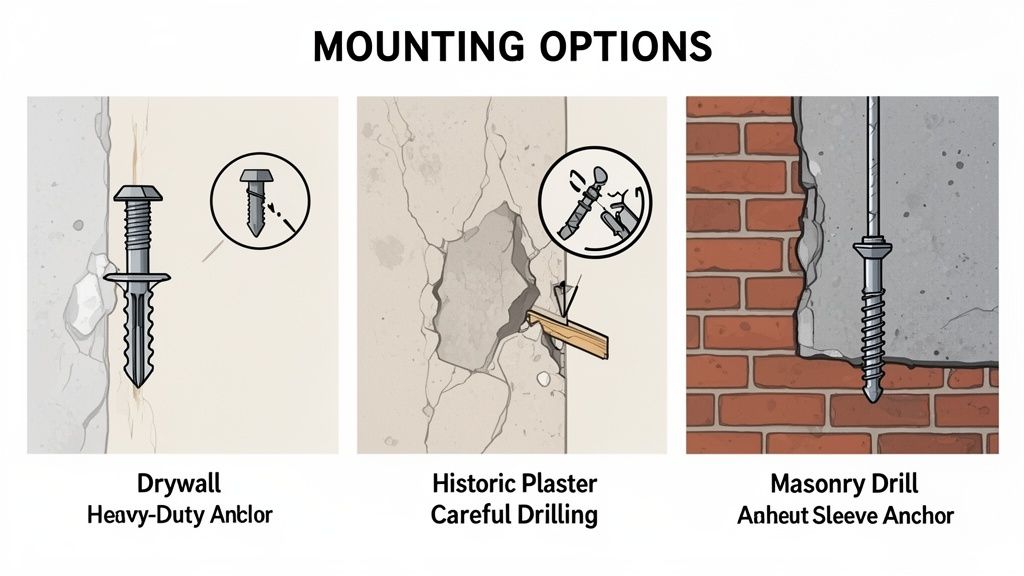
Handling Different Wall Types and Tricky Scenarios
Not all walls are built the same, especially when you’re talking about the mix of homes across the Greater Albany area. From historic houses in Greene County with tricky plaster and lath to modern builds sometimes sporting metal studs, the wall you’re working with completely dictates your game plan. Our Tip Top delivery teams have seen it all since 1978, and their real-world experience is what helps you sidestep common headaches like crumbling plaster or anchors that just won't hold.
Knowing what’s behind your paint is the secret to a secure installation that lasts.
Installing On Drywall Without Studs
Wouldn't it be great if your headboard lined up perfectly with two wall studs every time? In the real world, that’s rarely the case. If you can’t hit a stud, you absolutely have to use heavy-duty drywall anchors. Those standard little plastic plugs just won't have the strength needed for attaching a headboard to a wall.
Here are your best bets:
- Toggle Bolts: These are a fantastic solution. The winged part folds to slide through your pre-drilled hole and then springs open behind the drywall. This creates a really wide, secure base that distributes the weight.
- Molly Bolts (Hollow-Wall Anchors): These are another go-to for our teams. When you tighten the screw, a sleeve on the other side of the wall expands, gripping the drywall from the inside for an incredibly strong hold.
No matter which you choose, make sure the anchor is rated for the weight of your headboard. This is especially true for our solid wood Amish furniture pieces, which need high-capacity anchors to guarantee they stay put safely for years to come.
Our Expert Insight: A classic mistake we see is drilling a hole that’s too big for the anchor. It creates a loose fit that will eventually fail. Always use the drill bit size recommended on the anchor’s packaging for a snug, reliable grip.
Mounting On Brick Or Concrete Walls
Exposed brick and concrete can give a room a cool, industrial-chic vibe, but they demand a different toolkit. Trying to use regular screws here will only lead to frustration and a chewed-up wall. For these tough surfaces, you’ll need a hammer drill and specialized masonry bits.
You'll drill a pilot hole, pop in a masonry anchor (like a sleeve anchor or lead anchor), and then drive your screw into it. This creates a rock-solid mounting point that can handle even the most substantial headboards. It’s definitely more work, but the result is an installation that’s not going anywhere.
Tackling a project like this is all about breaking it down into manageable steps. You can apply that same logic to other home updates, too. For instance, our guide on how to decide if you can put new wallpaper over old walks you through a similar decision-making process.
If you’re dealing with a particularly complex headboard, unusual wall materials, or you’d just feel better with an expert eye, you might consider professional residential hanging services. Getting a beautiful new bedroom set should be exciting, not a source of stress, and our flexible Financing options are designed to make the whole process smooth and affordable.
Troubleshooting and Ensuring Long-Term Safety
You’ve measured twice, drilled once, and your new headboard is on the wall. But what if it has a slight wobble? Or you’re worried about it staying secure over time? Don’t panic. We’ve been helping homeowners from Albany to Greene County with their furniture since 1978, and we’ve seen just about every little hiccup you can imagine. A small issue doesn't have to turn into a big project.
The most common call we get is about a headboard that feels a bit loose after installation. First things first, go back and check your hardware. A screw can feel tight but might need one last half-turn to be truly secure. If everything is snug but there's still a tiny gap or a bit of play, thin wooden shims are your best friend. Simply slide one behind a mounting bracket to close the gap—it’s an old-school trick that works every time.
Your Long-Term Safety Checklist
Getting your headboard securely mounted is a great start, but it’s smart to give it a quick check-up once a year or so. A heavy piece of furniture deserves that extra bit of attention, especially when it’s hanging over where you sleep. The safety of your family is what matters most.
Here’s a simple routine to keep things solid:
- Give it a Wiggle: Gently try to move the headboard side-to-side. Does it feel as solid as the day you installed it, or is there new movement?
- Inspect the Hardware: Take a quick look at the screws and brackets. You're looking for any signs of loosening or stress marks on the wall around them.
- Listen for Noises: A properly mounted headboard is a silent one. If you start hearing creaks, groans, or shifts when you get into bed, it’s a sign that something has worked itself loose.
- Remember its Purpose: A wall-mounted headboard is a beautiful decorative anchor for your room, but it isn’t a jungle gym or a backstop. Be mindful that its job is to look great and stay put.
Our Commitment to You: At Tip Top Furniture, our relationship with you doesn't end when you leave our Freehold showroom. We’re your long-term furniture partner. If you ever feel your installation is too complex or if you’ve run into a problem you can’t solve, we can connect you with trusted local installers who can get the job done right.
When to Call for Professional Help
Sometimes the smartest DIY move is knowing when to pick up the phone. If you open up a wall and find a surprise—like electrical wiring or a plumbing pipe right where you planned to drill—it's time to stop and call a pro.
Professional help is also the best route for exceptionally heavy headboards, like some of our solid Amish-made furniture, or for tricky installations in the beautiful (and sometimes challenging) walls of historic Capital Region homes. A pro will make sure the job is done right, protecting both your new furniture and your home.
Common Questions About Wall-Mounting Headboards
After you've finished a project, it's natural for a few last-minute questions to pop into your head. Here at Tip Top Furniture, with over 45 years of experience serving our neighbors from Freehold to the greater Capital Region, we’ve pretty much been asked everything. Here are some quick, practical answers to the questions we hear most often about attaching a headboard to the wall.
How High Should I Mount My Headboard?
The biggest goal here is to avoid that annoying gap where your pillows disappear behind the bed. As a great starting point, we always suggest positioning the bottom of the headboard 2 to 4 inches above the top of your mattress.
Of course, the "perfect" height really depends on your mattress thickness and bed frame. If you want to get it just right before drilling any holes, our Professional Design Services team is always on hand to give you some personalized advice based on their decades of experience.
Can Any Headboard Be Wall-Mounted?
The short answer is: almost! Most headboards can be wall-mounted with the right hardware, but some are definitely easier to work with than others. If you have an especially heavy or uniquely shaped headboard, you might need a more specialized solution like a French cleat system for the best support.
If you know you want that clean, floating look from the start, our Custom Order program is the perfect way to go. We can help you design a headboard that’s built specifically for wall-mounting, ensuring it’s the perfect fit for your room. You can also find some incredible pieces ready for a wall-mount project in our Clearance section—they’re a great way to get creative with a high-quality find.
Can I Do This In My Capital Region Apartment?
Absolutely! Mounting a headboard is a fantastic way to make a rental feel more like your own. The most important first step, though, is to always check with your landlord or property manager. Make sure you understand the rules in your lease agreement about drilling into the walls.
The good news is, there are plenty of options that cause minimal damage. For city living in Albany or Troy where every inch of floor space counts, using heavy-duty adhesive strips or even a stylish freestanding headboard can give you the look you want without leaving permanent marks. For more answers to common furniture questions, feel free to check out our comprehensive FAQ page.
For any project, big or small, Tip Top Furniture & Mattresses is here to help you create a home you love. From custom-ordered Amish furniture to the perfect USA-made mattress, our team in Freehold, NY, is ready to provide the local expertise you can trust. As a family business since 1978, we offer one-stop shopping with personalized service for the entire Greater Albany Capital Region.