Furniture Scratch Repair Made Simple for Albany Homes


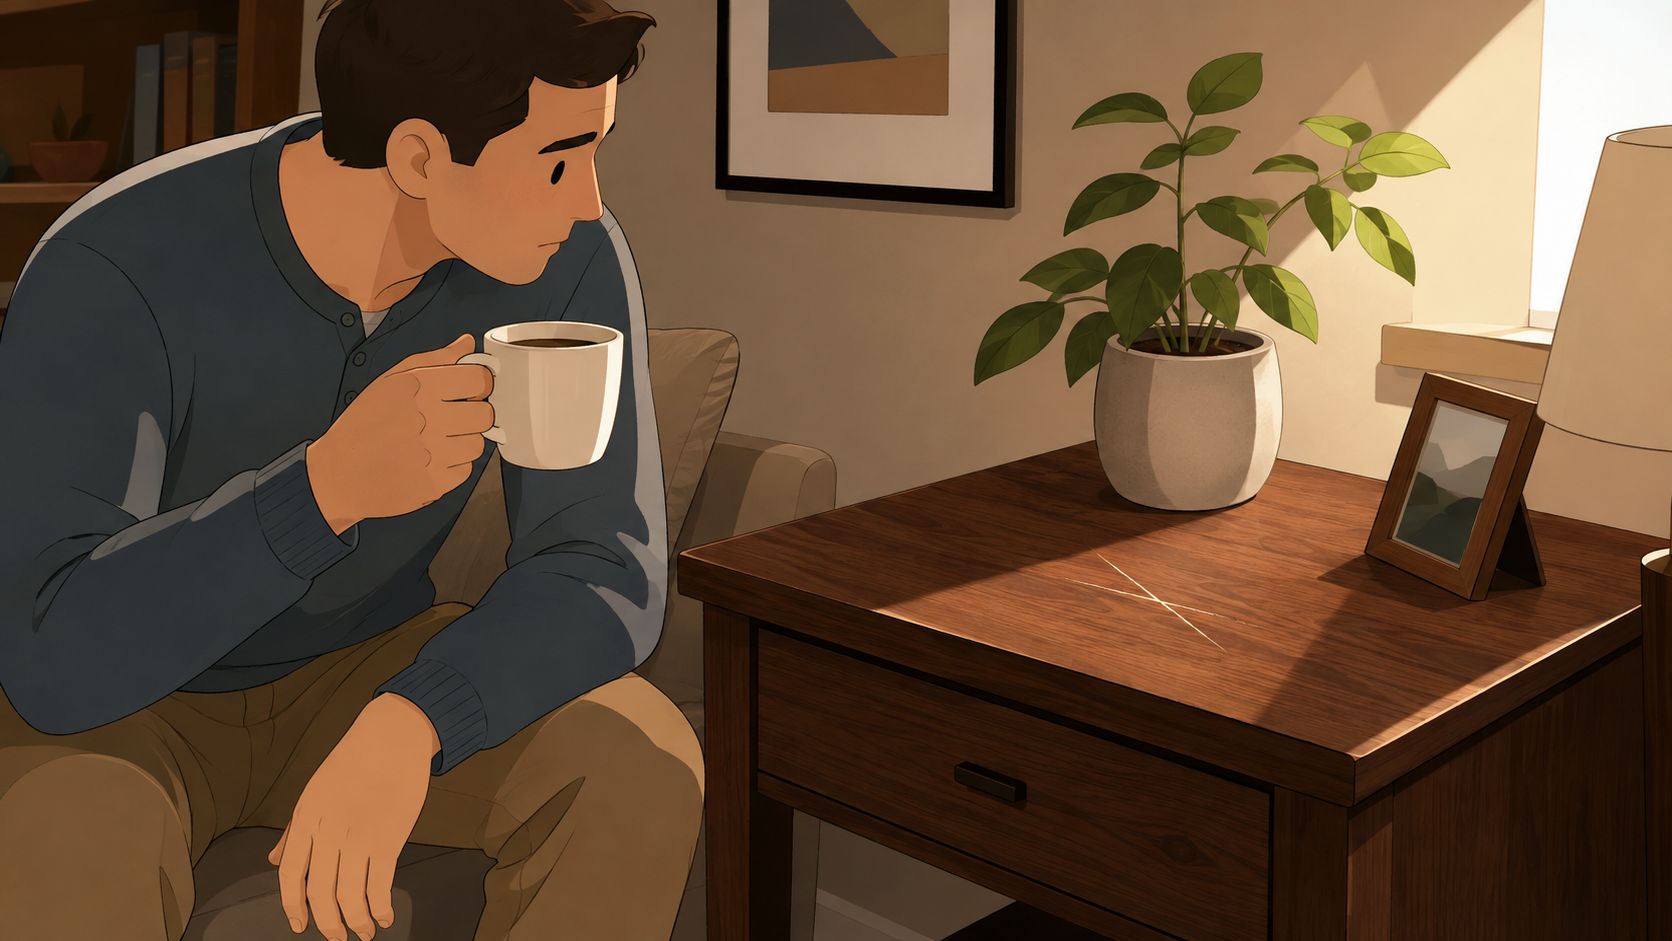
A coffee cup pauses halfway to the mouth when sunlight catches a pale line across a walnut side table. The first instinct is usually to reach for a marker, rub harder, or search for a quick household remedy. That instinct can turn a manageable finish mark into a darker stain, a glossy patch, or damage that needs professional refinishing.
Furniture scratch repair works best as a triage process. The scratch's depth, the surface material, the furniture's value, and the condition of the finish should determine the method. A daily-use table and a custom Amish heirloom may show the same mark, but they shouldn't receive the same treatment.
Furniture damage is common enough to justify a measured approach. A major U.S. consumer survey found that 174.8 million Americans had damaged furniture, while 61% of accidents happened within the first two years of ownership. Dents and scratches represented 7% of reported damage incidents, and people spent an average of $299 repairing or replacing their most recently damaged piece. Those figures place a small scratch inside a much larger repair-and-replacement decision, particularly when nearly half of damaged pieces originally cost more than $500 and almost one-quarter cost more than $1,000. The survey summary and furniture damage findings provide useful context.
Spotting the Scratch and Deciding What to Do Next
A scratch deserves inspection before it deserves a product. Start by moving the furniture into even light, taking a quick photograph, and viewing the mark from several angles. Direct sunlight can exaggerate shallow scuffs, while dim room lighting can hide a broken finish.
Three checks before touching the finish
- Look at the furniture's role. A kitchen table used every day can justify a restrained cosmetic repair. A rare, sentimental, custom, or heirloom piece deserves a more conservative decision.
- Check the edges. A fingertip can reveal a raised finish edge, lifted veneer, or loose fragment that a photograph doesn't show.
- Record the original condition. Photos preserve the appearance before work begins and can help with a future professional estimate, warranty conversation, or documented damage claim.
A scratch that only changes the reflection may need little more than careful cleaning and a compatible polish. A mark with loose finish, exposed wood, or a crushed edge needs a different path. Rubbing a wax stick into a damaged area before identifying that difference can pack residue into the wrong place and make later refinishing harder.
Practical rule: Classify first, repair second. The few minutes spent inspecting the mark usually save more time than an impulsive touch-up.
Preventive habits matter just as much as the repair itself. Guidance on damage prevention for home finishes can help homeowners reduce the wear caused by everyday objects, movement, and cleaning. Tip Top's wood furniture care guide also gives Albany-area households a useful maintenance reference. The next decision is simple: determine whether a fingernail catches the scratch, then identify what sits on top of the wood.
Telling Surface Scratches from Deep Gouges
The clean fingernail test is the fastest useful diagnostic at the kitchen table. After cleaning the area, run a fingernail perpendicular to the scratch, not along its length. If the nail glides over the line, the damage probably sits in the finish. If the nail catches, the wood or substrate has likely been breached.
A finish-only scratch can often respond to gentle cleaning, polish, wax, or careful blending. A scratch that catches needs material added back through a wax fill, filler, color work, or broader refinishing. The distinction matters because ink-like markers can color a deep groove without rebuilding its surface, leaving a dark line that still catches light.
Identify the surface before choosing a product
Test an inconspicuous corner with a cotton swab and a tiny amount of mineral spirits. The hidden-corner test can offer clues about whether the finish behaves like shellac, lacquer, or polyurethane, but it shouldn't be treated as a laboratory identification. If the finish softens, clouds, or transfers, stop and avoid applying the same solvent to the visible area.
Veneer requires extra restraint because its decorative wood layer can be very thin. Solid wood allows more corrective work, while veneer can be damaged quickly by aggressive sanding or repeated color removal. The distinction between materials is explained in this guide to solid wood versus particle board.
| Severity | What You Feel | Typical Fix |
|---|---|---|
| Light | The nail glides over the mark and no wood feels exposed | Clean, polish, wax, or use a restrained color blend |
| Medium | The line is visible and may feel slightly uneven | Stain marker, blending stick, or semi-hard wax |
| Deep | The nail catches, the groove has missing material, or an edge is raised | Filler, controlled sanding, color matching, and resealing |
That grade isn't a substitute for judgment. A light scratch on a rare finish may deserve professional handling, while a medium mark on a modern side table may be a sensible home project.
Fixing Shallow Scratches on Solid Wood
A shallow scratch on a solid-wood table rarely needs a dramatic makeover. Start with the damaged zone, work with the grain, and stop as soon as the mark blends with the surrounding finish. The right repair depends on depth, finish behavior, and the furniture's value. A valuable or irreplaceable piece deserves more restraint than a modern everyday table.
Gather the materials first
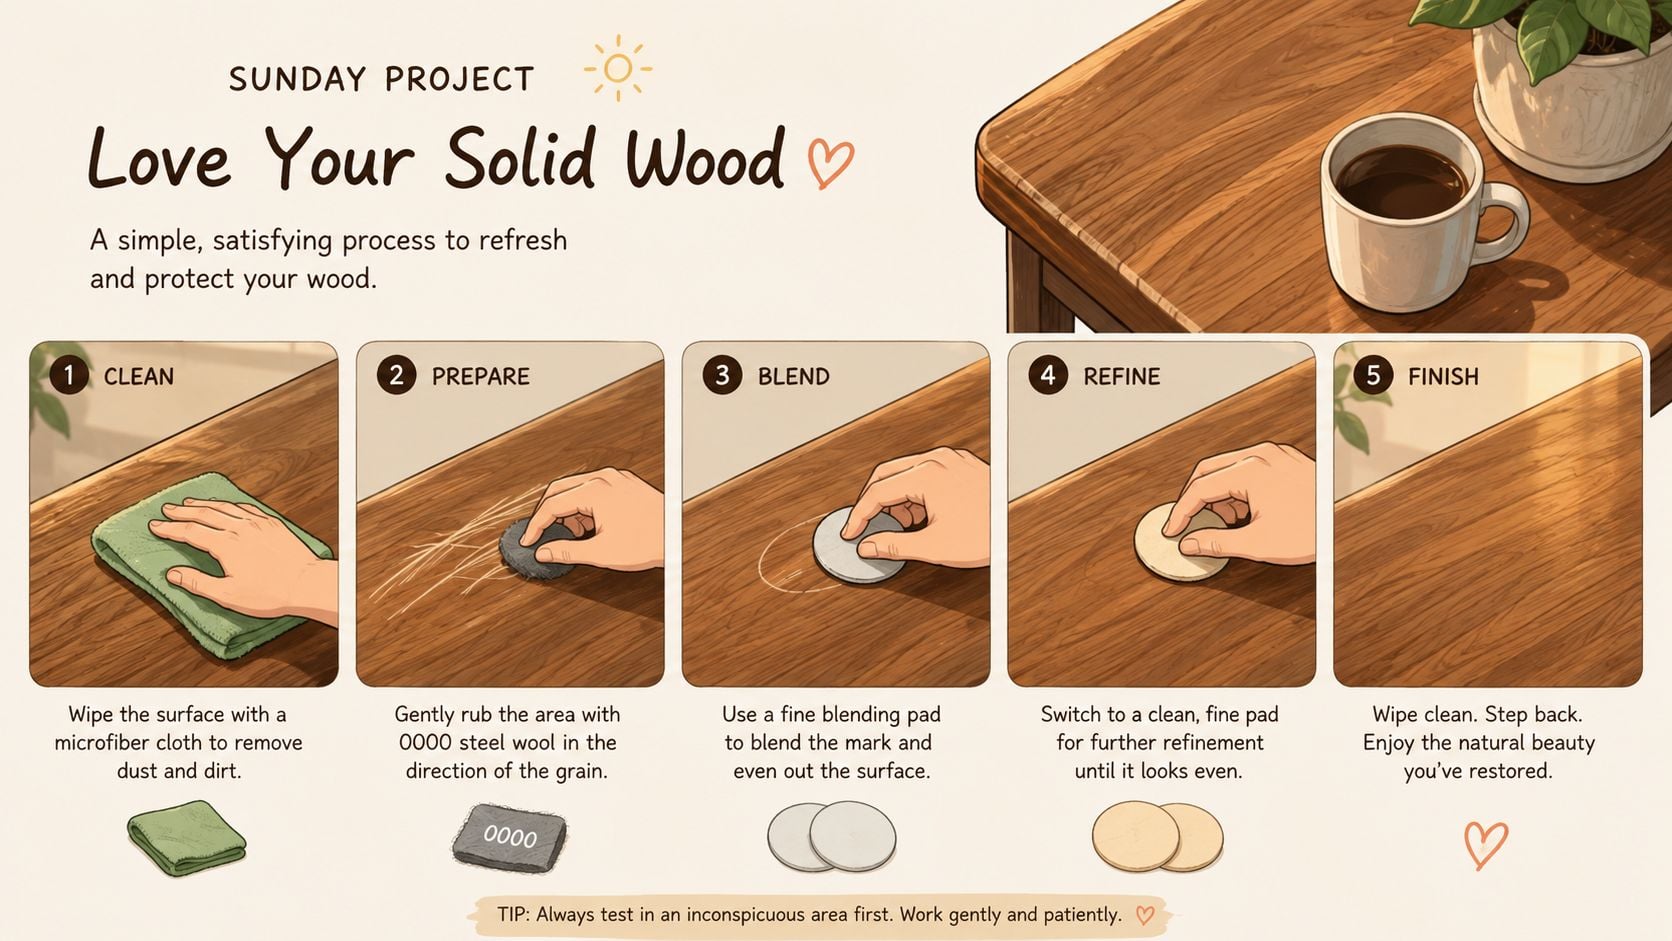
Set out soft microfiber cloths, 0000 steel wool, fine synthetic pads, blending sticks or wax fill sticks matched to the wood species, a clean cotton rag, and a small foam brush. Keep a compatible topcoat nearby, such as wipe-on polyurethane or hard wax oil, but check the existing finish before applying it. Different coatings can react badly, leaving cloudy patches or poor adhesion.
Test the planned repair in a hidden or low-traffic spot. This small trial checks the color, sheen, and solvent behavior before the visible surface is involved. For broader protection advice, see this guide to protecting wood furniture from scratches and stains.
Use a restrained sequence
- Clean gently. Wipe the area with a barely damp cloth, then let it dry fully. Dust in the scratch can make the repair gritty and prevent an even color blend.
- Flatten only raised fibers. Use 0000 steel wool or a fine synthetic pad with very light pressure, moving along the grain. The aim is to soften lifted wood, not remove sound finish around it.
- Build color gradually. Draw a matched blending stick across the mark, then wipe off excess with a clean cotton rag. Wood grain often contains several related tones, so work from lighter to darker colors rather than forcing one dark line into place.
- Level wax where needed. Pull a wax stick firmly along the scratch, then remove the excess with a thin plastic card. Leave the surface flush. A raised wax ridge will catch light and advertise the repair.
- Protect the blend. Apply thin coats of a compatible wipe-on polyurethane or hard wax oil with a foam brush. If the product calls for it, let the coat dry completely, then sand lightly with 600-grit abrasive before applying another thin coat.
Allow time for drying between coats. Applying a new layer over soft wax or finish can create a dull patch and pull the color back out of the scratch.
Avoid shortcuts that create new problems
Pigment markers can bleed into open-grain wood, especially when overloaded. Household polishes containing silicone may make later refinishing and finish adhesion harder. Aggressive sanding near a veneer edge can expose its substrate, even when the rest of the furniture is solid wood.
Floors face similar wear from grit, chair movement, and dropped objects. Homeowners comparing larger wood-surface work can review Savera Wood Floor Refinishing services. Furniture repair still calls for a smaller working area and gentler pressure than broad floor refinishing.
Repairing Veneer, Laminate, Painted, and Leather Surfaces
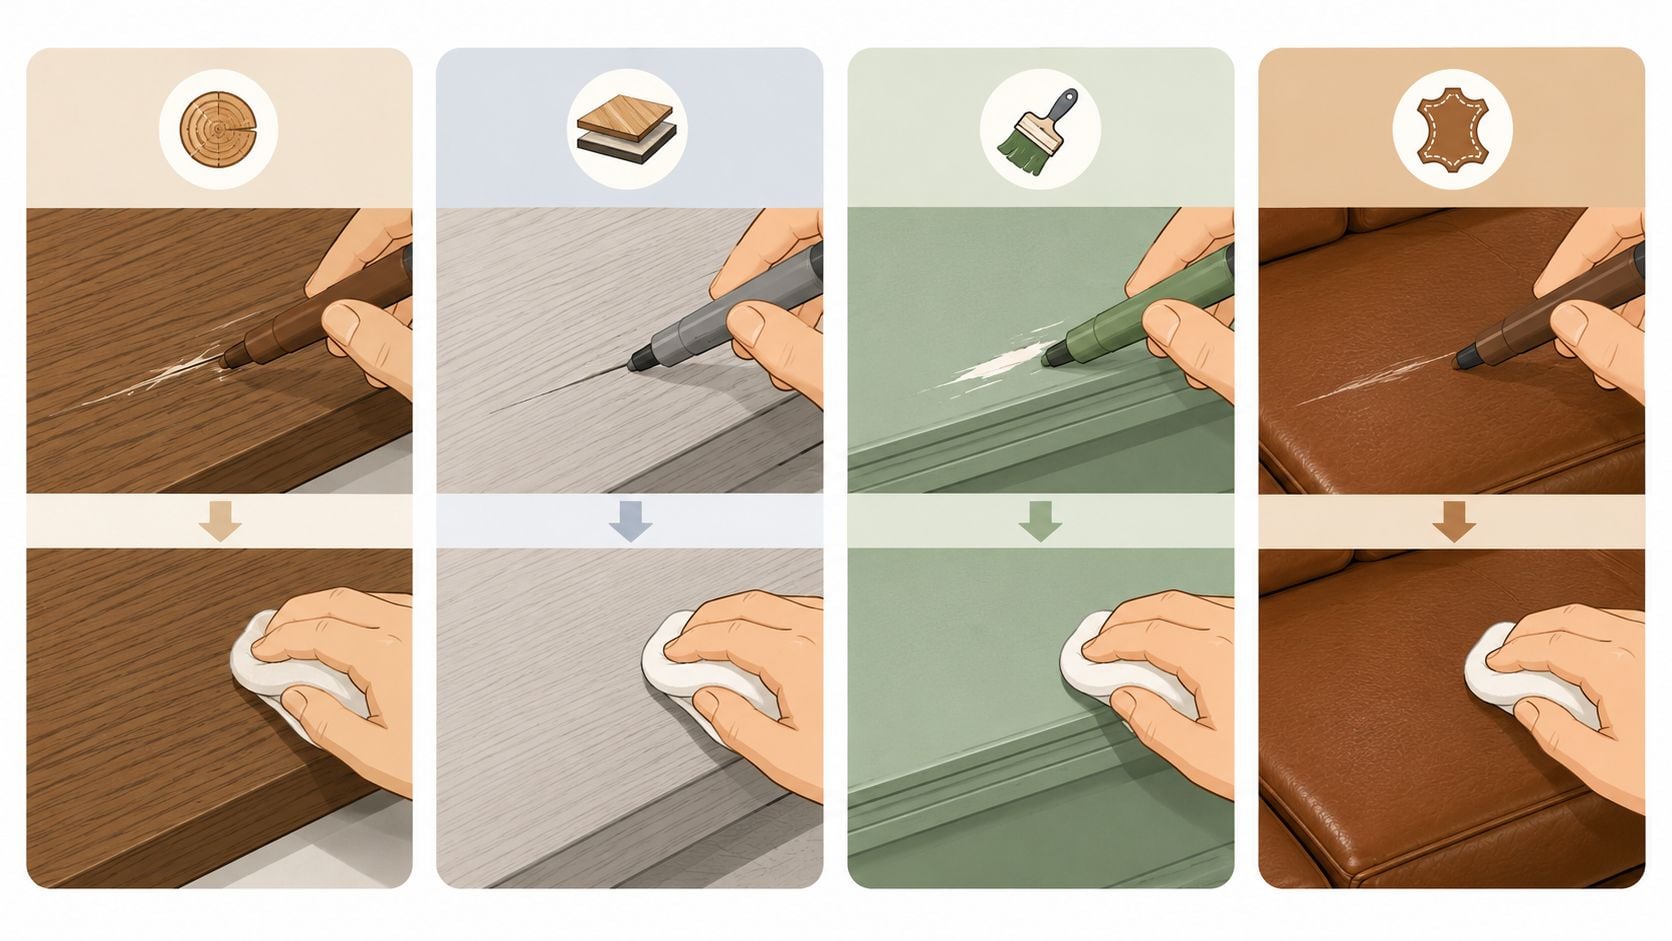
Different surfaces fail in different ways. A color touch-up that works on stained oak may look artificial on laminate, while a wood filler intended for timber has no place in a leather cushion. The repair material must match both the surface and the depth of the damage.
Veneer needs a light touch
For a thin veneer scratch, use a wood-tone marker stick, a soft cloth, and a small amount of paste wax. Apply color only inside the mark, buff along the grain, and seal with a light wax film after the color has settled.
Lifted veneer is a different repair. A restorer may reactivate old glue with controlled warmth, press the veneer under a waxed block, and trim the edge flush after the adhesive cures. Excess heat, heavy clamping pressure, or trimming before the glue sets can crack the veneer or pull it away from the core.
Laminate should stay mostly untouched
Laminate repairs generally use a color-matched laminate filler or putty stick. Pack only the damaged area, scrape it level, and use 600-grit abrasive only when necessary. Sanding through the printed surface exposes the substrate and makes the patch more obvious.
After curing, a laminate-appropriate polish can restore an even sheen. The common mistake is treating laminate like solid wood and sanding until the scratch disappears. Laminate has a decorative surface layer, so restraint matters more than depth correction.
Painted furniture depends on sheen
Clean the area first, then feather the damaged edge with 320-grit abrasive. If bare wood is visible, spot-prime it and let the primer cure according to its label. Apply a matched satin or semi-gloss paint with a small artist's brush, blending the edge wet-on-wet so the repair doesn't form a hard halo.
A mismatched sheen often makes a color-perfect repair visible. Too much paint creates a raised spot, while insufficient cure time can leave brush marks or a tacky surface.
Leather and vinyl require flexible materials
Clean leather or vinyl with a pH-balanced leather preparation product. Deeper scuffs need a compatible leather filler, followed by a matched colorant applied in thin layers and sealed after curing.
A heavy single coat is the usual failure point. It can crack, stay glossy, or sit above the original grain. For broader upholstery decisions, Tip Top's upholstery materials guide helps explain why material selection affects durability and appearance. Advice on Toronto no-sand furniture painting also offers useful perspective on preserving an existing finish rather than removing it unnecessarily.
When a Professional Repair Makes More Sense
DIY furniture scratch repair suits damage that is shallow, localized, and located on a piece whose finish can tolerate a small test. Stop experimenting when the scratch spans a broad visible area, reaches a structural joint, appears with water swelling, or affects sentimental or heirloom furniture. Depth is the first decision point. Value and surface type determine how much risk is acceptable.
Professional assessment is sensible when pet damage covers a large section, the finish uses an uncommon stain, or veneer has chipped away rather than just showing a mark. A failed color blend may be tolerable on an ordinary table, yet it can reduce the appearance and resale value of a custom or antique piece.
Judge cost against reversibility
Repair can make more sense than replacement when the furniture remains structurally sound. A separate summary of an earlier study estimated that 82 million Americans spent $23.5 billion repairing or replacing damaged items, with average repair costs of $287. It also reported that half of U.S. households had experienced furniture damage during the prior year. The Furniture repair and replacement market context supports a practical conclusion: judge the piece, its finish, and the repair risk, not the scratch alone.
Albany-area fees vary with material, access, finish complexity, and whether the work takes place at home or in a shop. Request a written estimate that separates touch-up labor, transport or in-home service, materials, structural work, refinishing, and warranty limitations.
| Damage Type | Typical DIY Cost | Typical Pro Cost | Recommended Action |
|---|---|---|---|
| Finish-only scuff | Qualitatively low, using basic cloths and compatible care products | Higher because of assessment and service time | DIY if the piece is ordinary and the finish is stable |
| Localized groove | Moderate, with color material and filler | Higher when color matching or finish blending is complex | DIY on a low-risk piece, professional review for custom work |
| Broad gouge, swelling, or veneer failure | Materials alone may not solve the problem | Can involve structural repair and refinishing | Request an assessment before sanding or filling |
Newer furniture may include warranty conditions affected by unauthorized refinishing. Take photos before touching the surface. They document the condition for a seller, insurer, or repair professional.
A Tip Top service request lets homeowners in Freehold, Albany, Schenectady, Troy, and nearby communities start the assessment process. Ask what can be blended, what must be rebuilt, which finish will be applied, and what result is realistically achievable. If the answer depends on sanding away more original material, pause before approving the work.
Preventing the Next Scratch and Caring for Albany Homes
Albany-area homes put furniture through seasonal changes, winter heating, tracked-in grit, and frequent movement. Prevention starts where contact occurs, not with a bottle of polish after the damage appears.
Build protection into daily routines
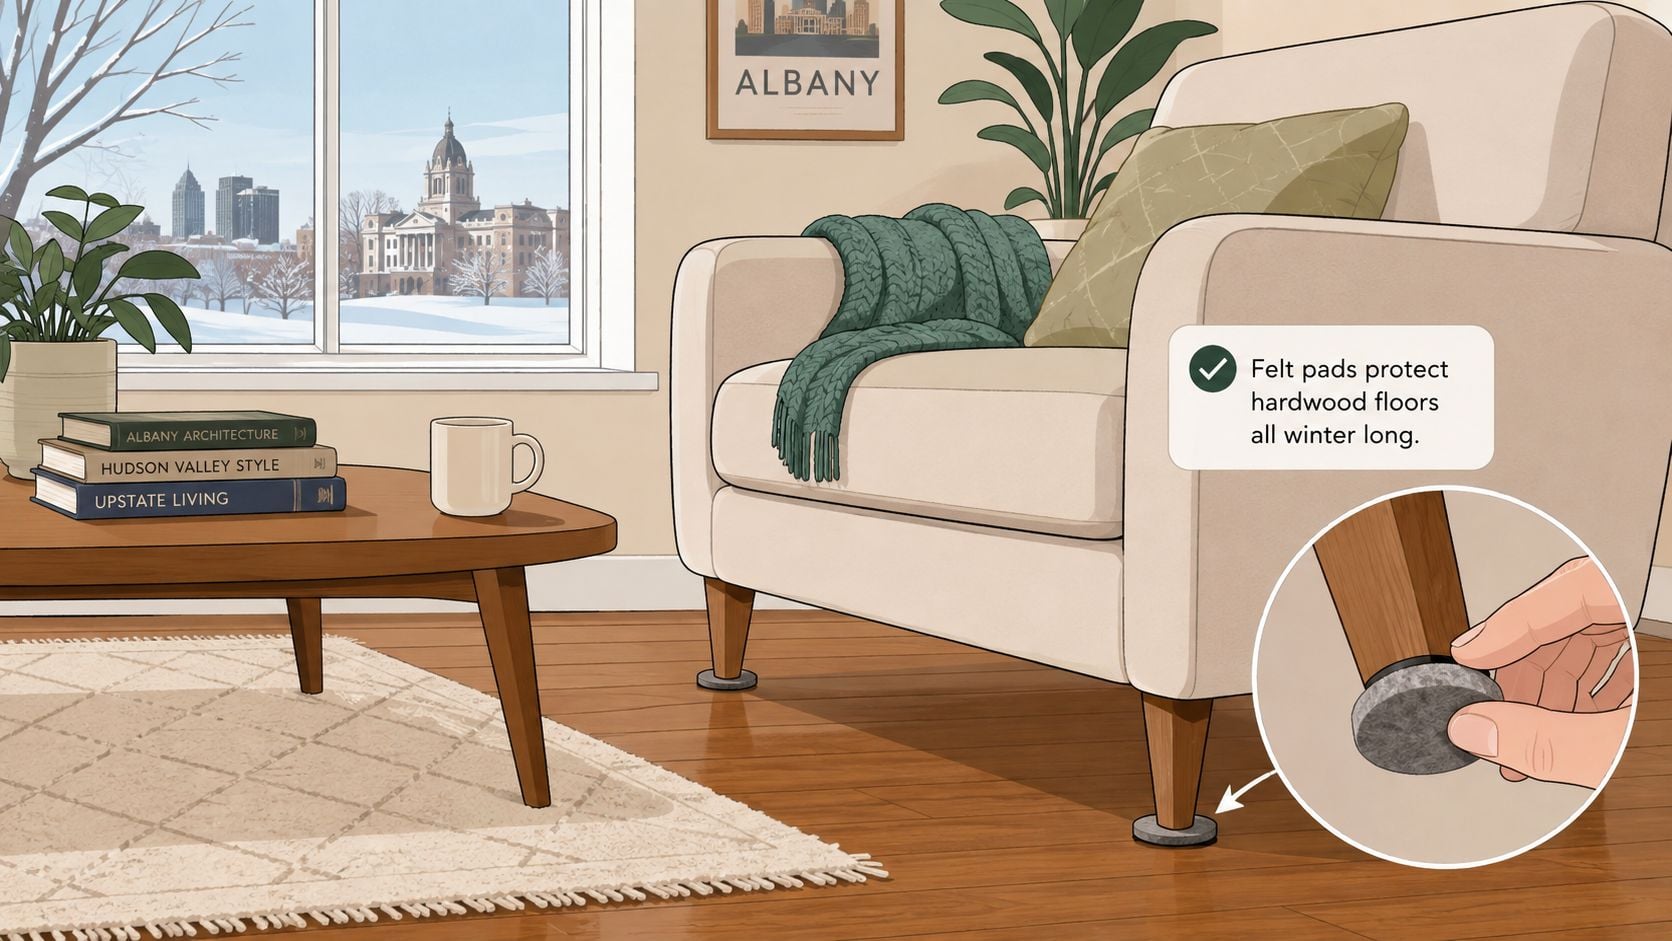
- Use properly sized felt pads. Pads should cover the contact point without hanging over the edge. Replace compressed or grit-filled pads before they become abrasive.
- Upgrade chair glides. Smooth glides reduce drag on hardwood and help prevent repeated scoring around dining tables and desks.
- Create landing zones. Trays and coasters should hold keys, plants, candles, glasses, and other objects that can scratch, stain, or leave moisture rings.
- Control winter conditions. Place a humidifier away from direct contact with wood and maintain a stable household environment during heating season. Sudden dryness can contribute to checking and movement in solid wood.
- Manage direct sun. Rotate upholstered pieces and use window protection near south-facing windows so color and surface wear develop more evenly.
Give each room a short monthly inspection
A six-minute routine can catch small problems before they become repair projects:
- Check tabletops, drawer fronts, chair legs, and other high-contact zones.
- Tighten loose hardware before movement creates additional wear.
- Vacuum crevices with a brush attachment to remove grit.
- Buff surfaces protected with paste wax using a clean, soft cloth.
- Take quick phone photographs from consistent angles each season.
Photos create a useful condition record and make future repair conversations clearer. They can also support an insurance claim when damage is documented promptly, although coverage always depends on the individual policy.
Tip Top Furniture & Mattresses has served the region from its family-owned Freehold showroom since 1978, with Professional Design Services available since 1984. Customers across the Greater Albany Capital Region can discuss furniture care alongside room planning, custom ordering, Amish furniture handcrafted in the USA, USA-made mattresses, flooring coordination, flexible financing, and inventory from more than 50 trusted manufacturers. For a piece worth preserving, an in-person conversation can be more useful than another untested shortcut.
Tip Top Furniture & Mattresses offers local guidance for furniture, mattresses, décor, flooring, custom orders, and care decisions from its Freehold, NY showroom, serving Albany, Schenectady, Troy, Greene County, and the surrounding Capital Region. Bring photographs of the damage or visit Tip Top Furniture & Mattresses to discuss a practical repair path, financing options, delivery, or a replacement that fits the home.